1. Installation and registration of the application
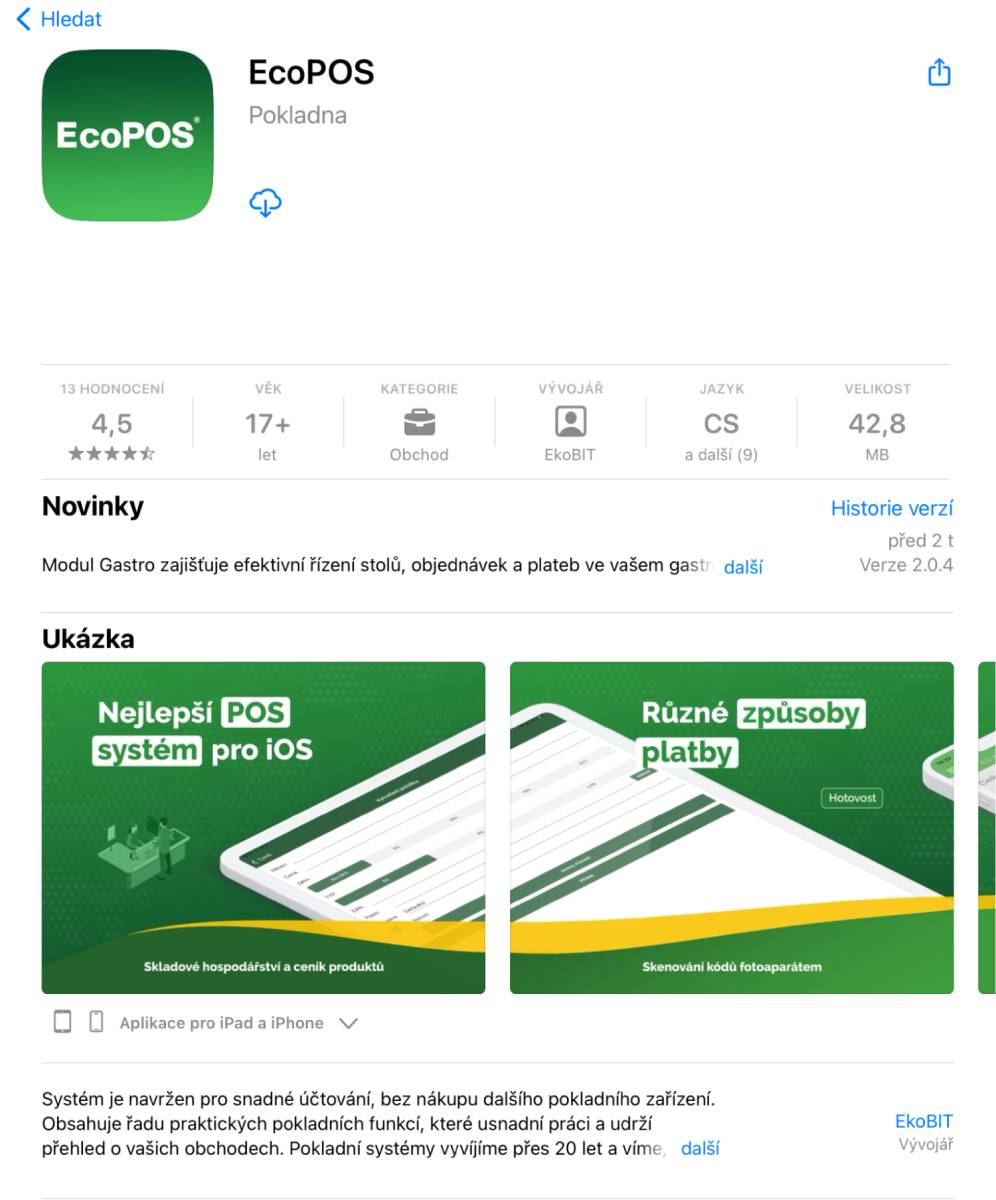
- Search for “BitcoinPOS” in the App Store and install the application.
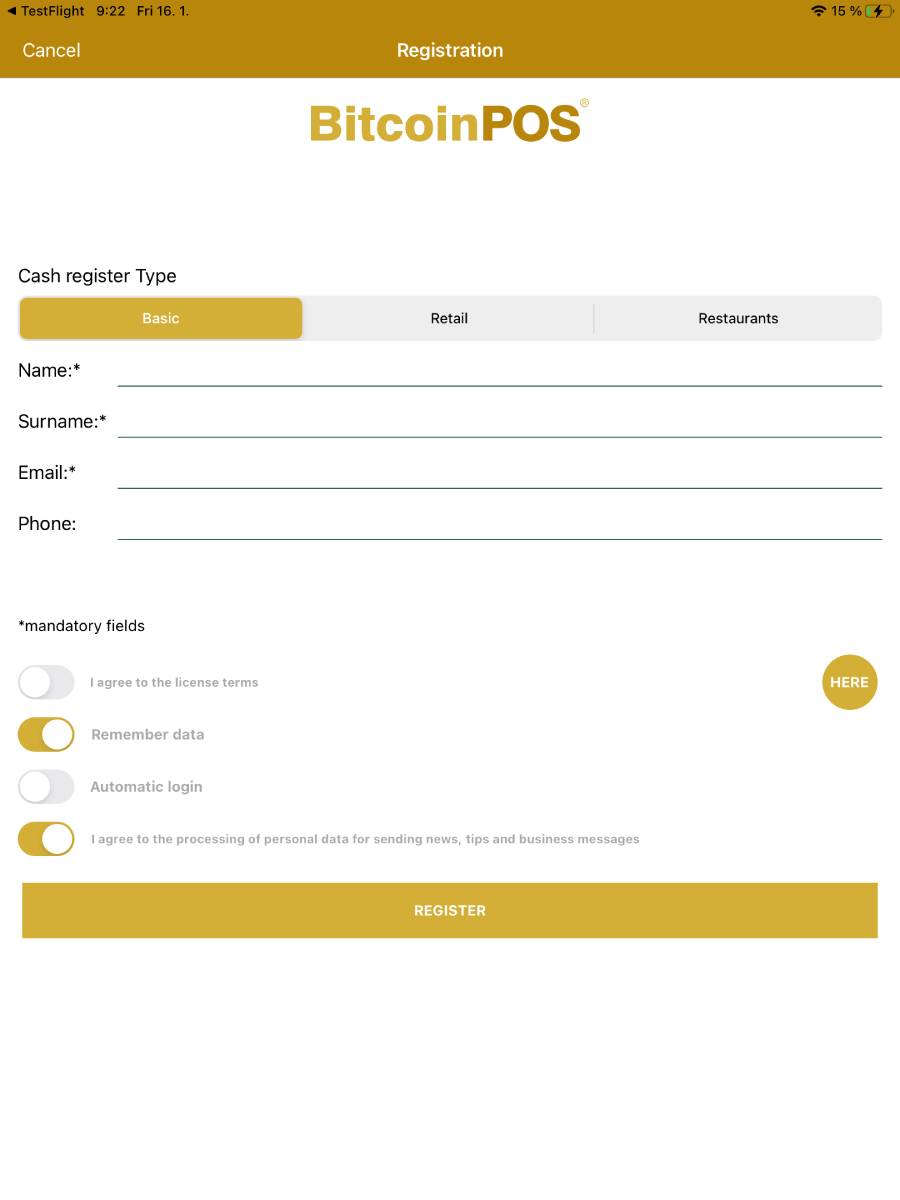
- After installation and the first launch you must register the application, which creates a licence for your device. The licence is non‑transferable and tied to the device.
- Fields that are required to be filled in are marked with an asterisk *.
-
During registration you can choose the application language and also the application type.
- In the trial version (30 days from installation) all functions and all types of the application are available.
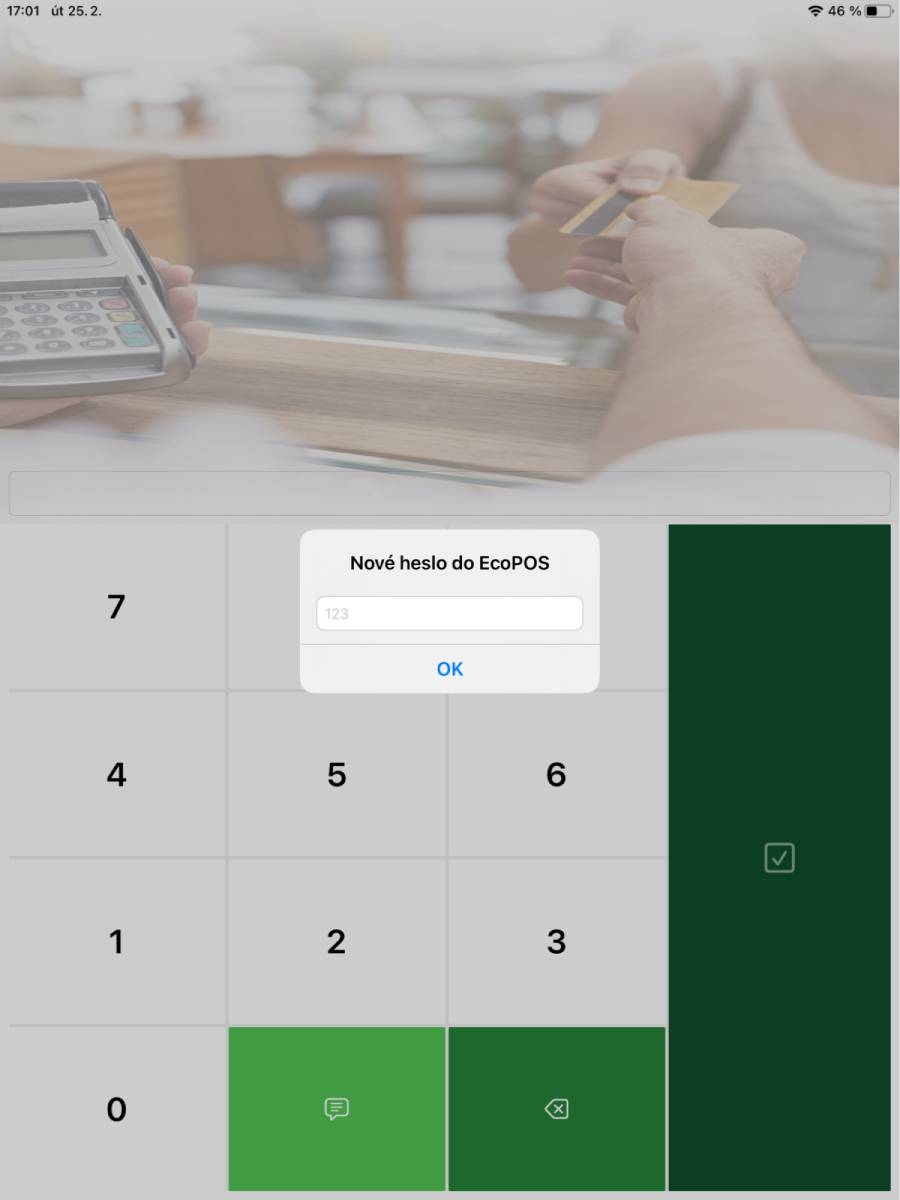
- After registering the application you will be prompted to enter a login password. You can change the password at any time after logging in.
2. Login screen
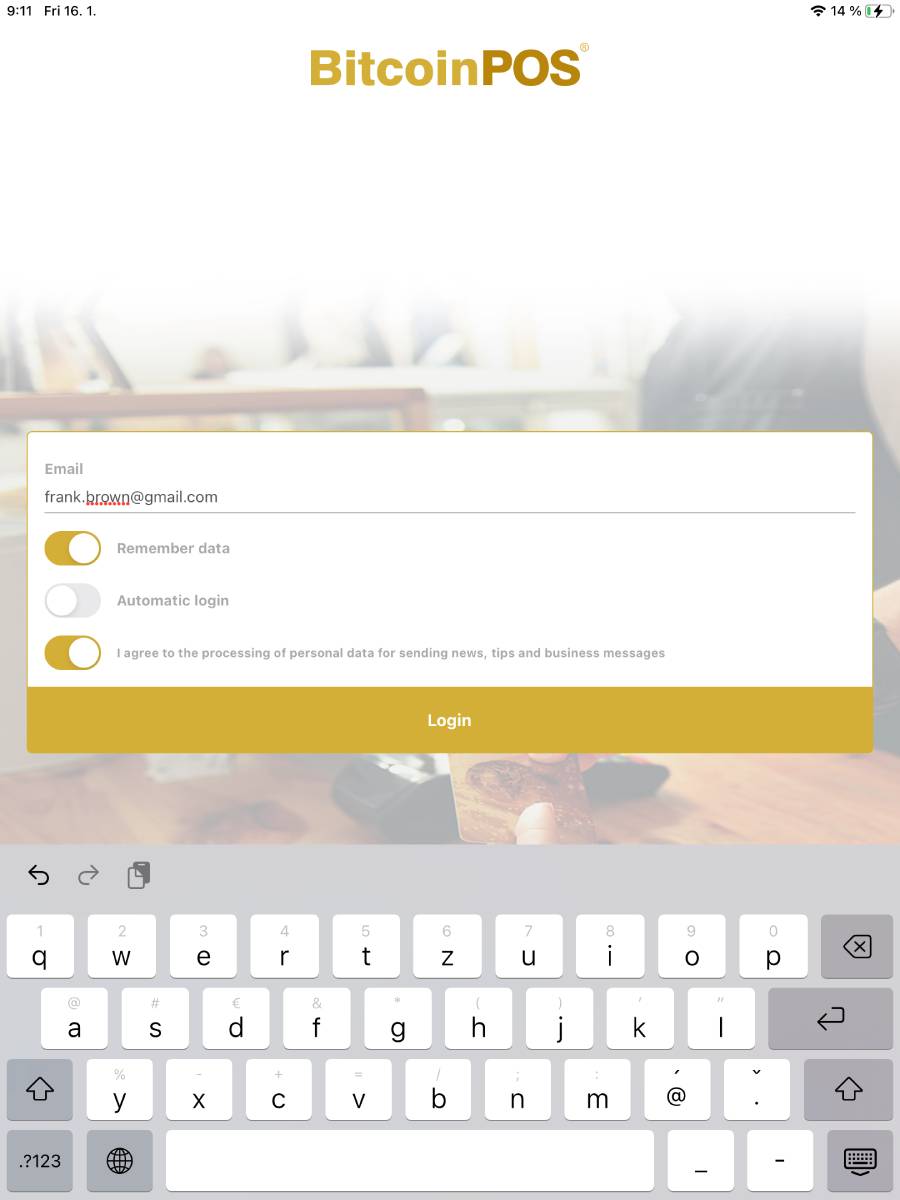
- Email
- The email address entered during registration is used to log into the system.
- Remember data
- Toggle to remember login credentials so you don't need to enter them each time.
- Automatic login
- Toggle for automatic login if valid login details have been previously entered.
- I agree to the processing of personal data for sending news, tips and business messages
- Toggle to agree to the processing of personal data for sending news and business communications.
- Log in
- Button to log into the application.
3. Basic application menu
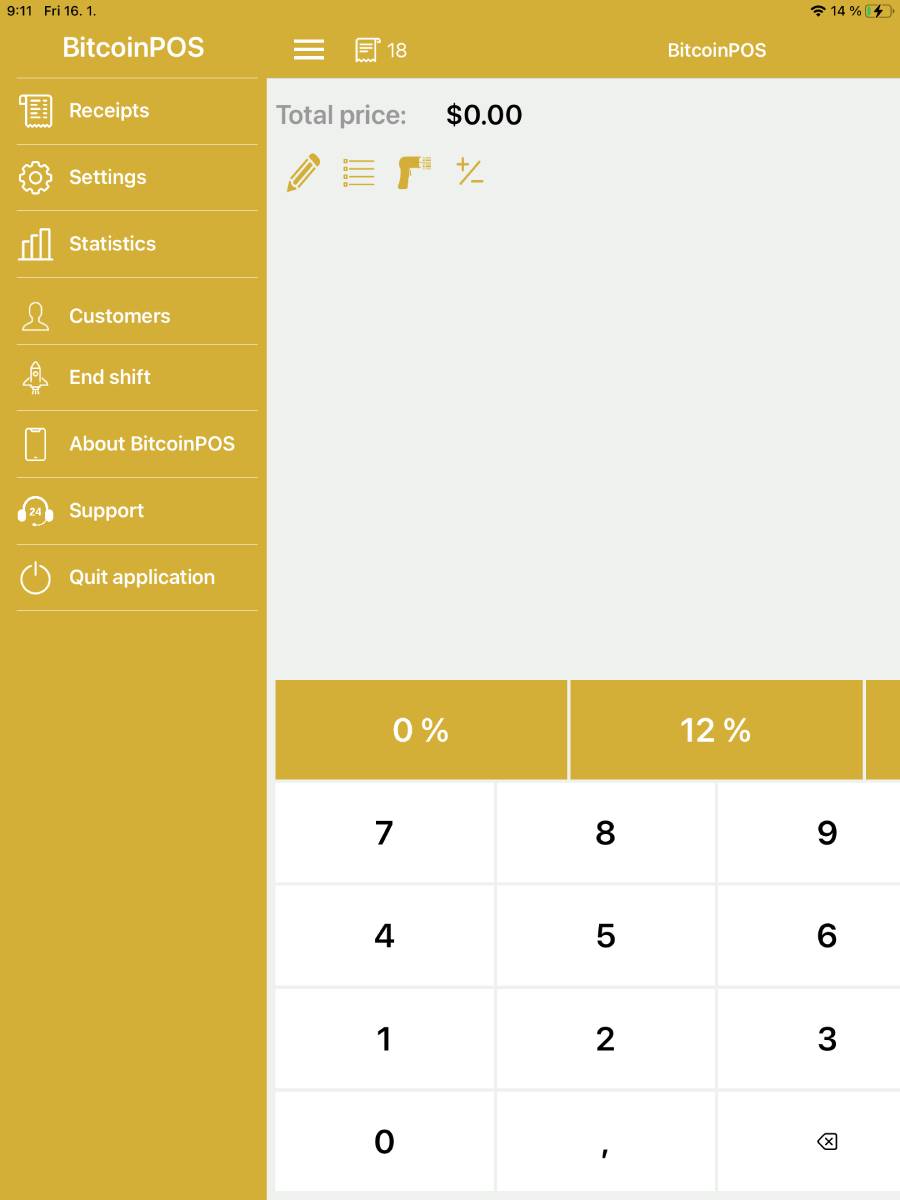
- Receipts
- Display closed receipts for a selected period.
- Settings
- Application settings including available modules (Items list, Inventory, Payment terminal, …).
- Statistics
- Display statistics of item sales and takings.
- Customers
- Manage and edit customers.
- End shift
- Ends the shift and prints the end‑of‑shift report.
- About BitcoinPOS
- Information about the application (displays the version number, licence number and other data).
- Support
- Option to contact BitcoinPOS application support.
- Quit application
- Logs out the user and closes the application.
3.1. Receipts
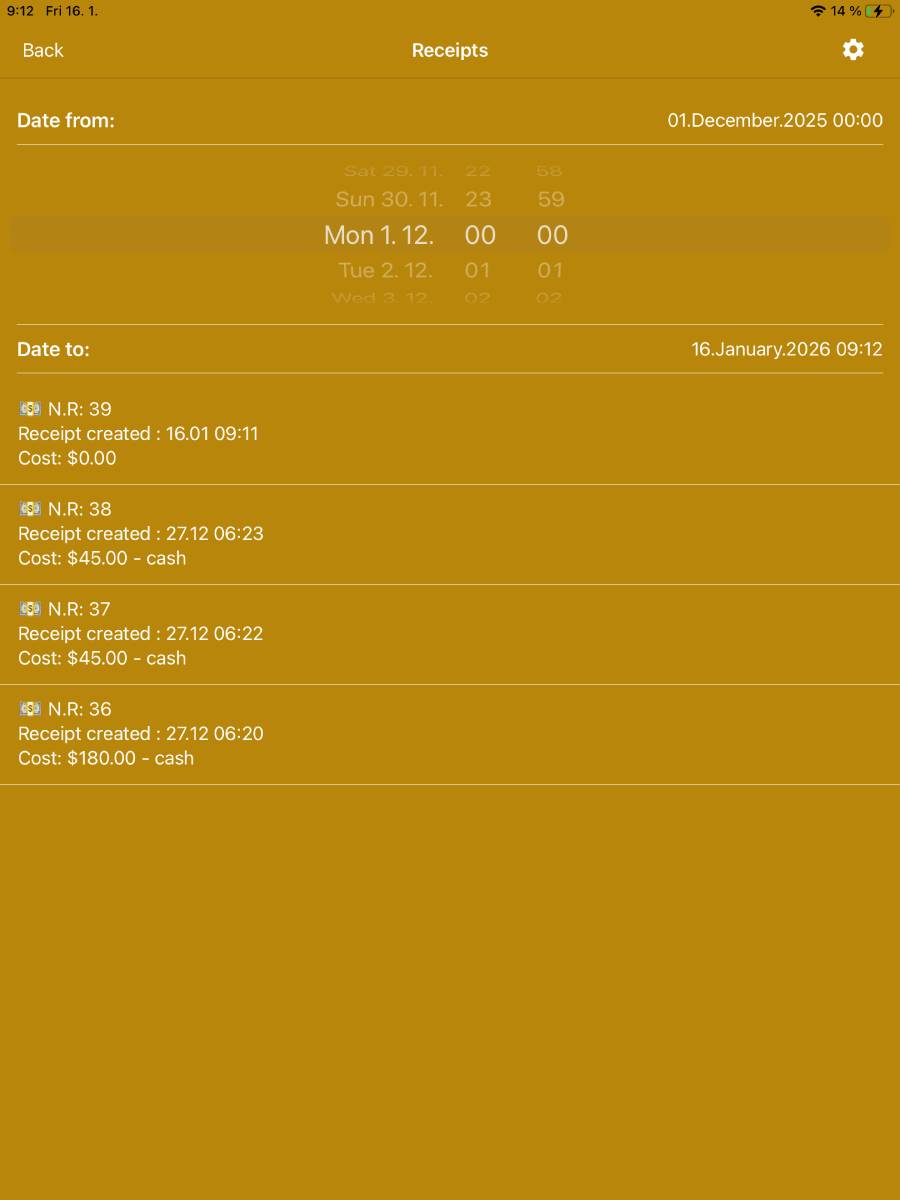
- Displays closed receipts for a selected period.
- You set the period by clicking in the Date from or Date to field.
- You set the date and time by scrolling in the desired column.
- You can view the details of a receipt by clicking on the selected receipt.
-
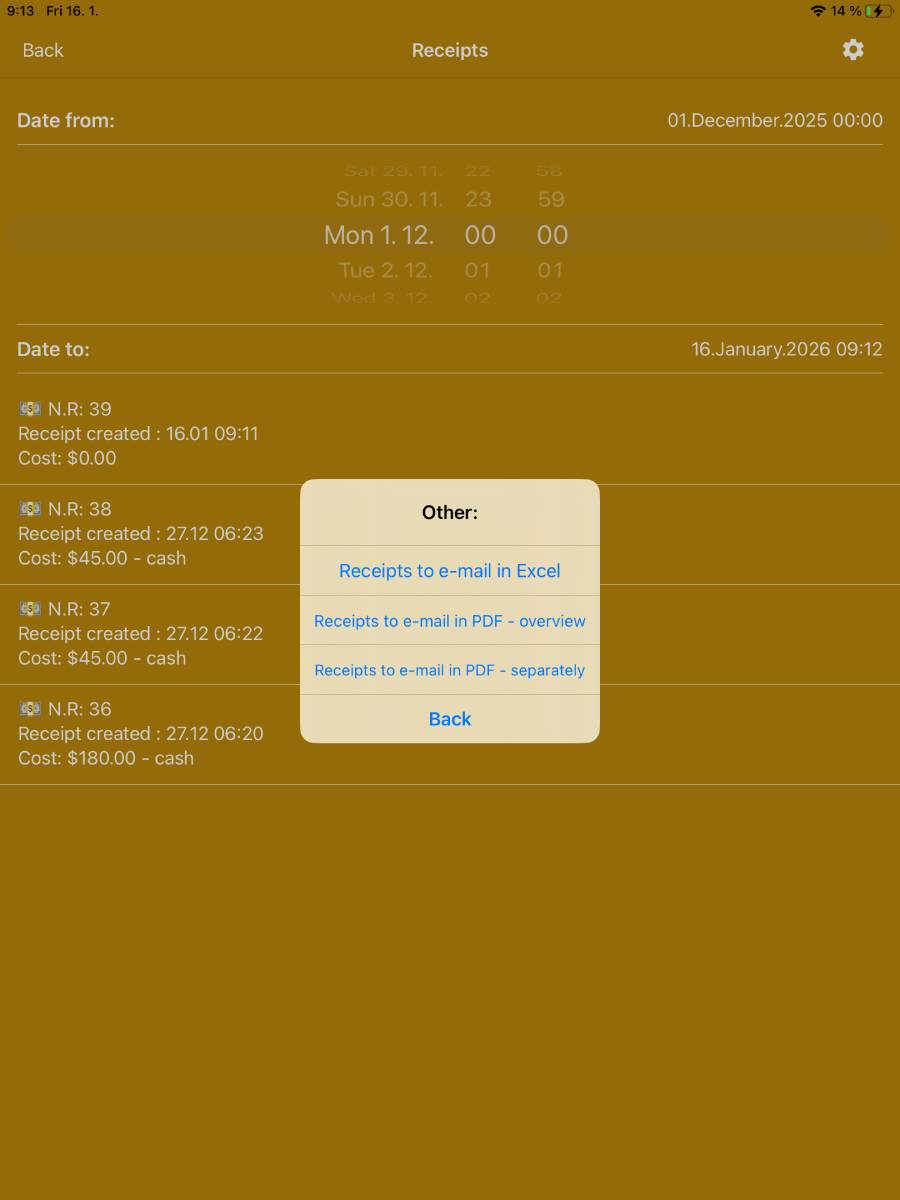
Gear button
 Use this button to open the menu for additional functions:
- Receipts to email – Excel, overview
- Receipts to email – PDF, overview
- Receipts to email – PDF, separately
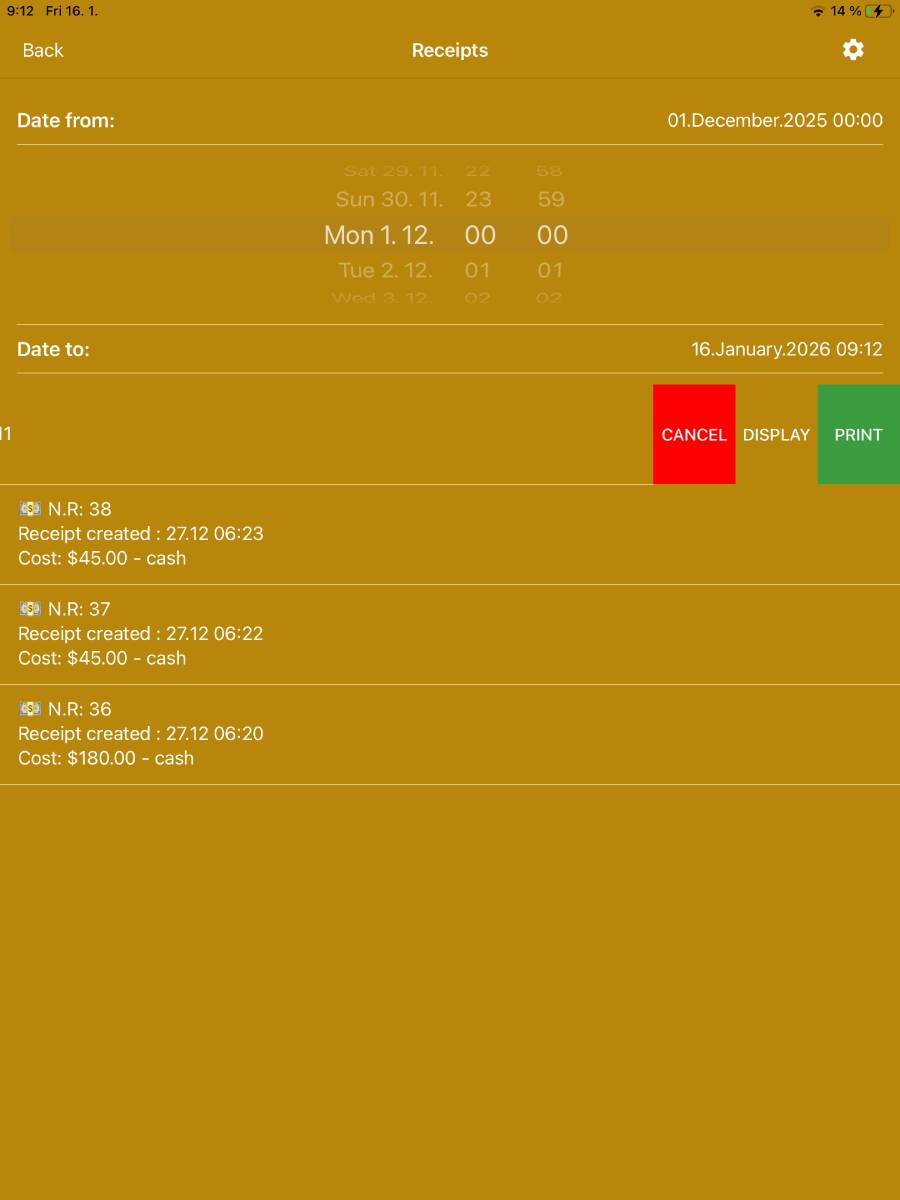
- Swipe from one edge to the other to display additional options for the selected account: Cancel, Display and Print (to immediately print the receipt on the connected printer).
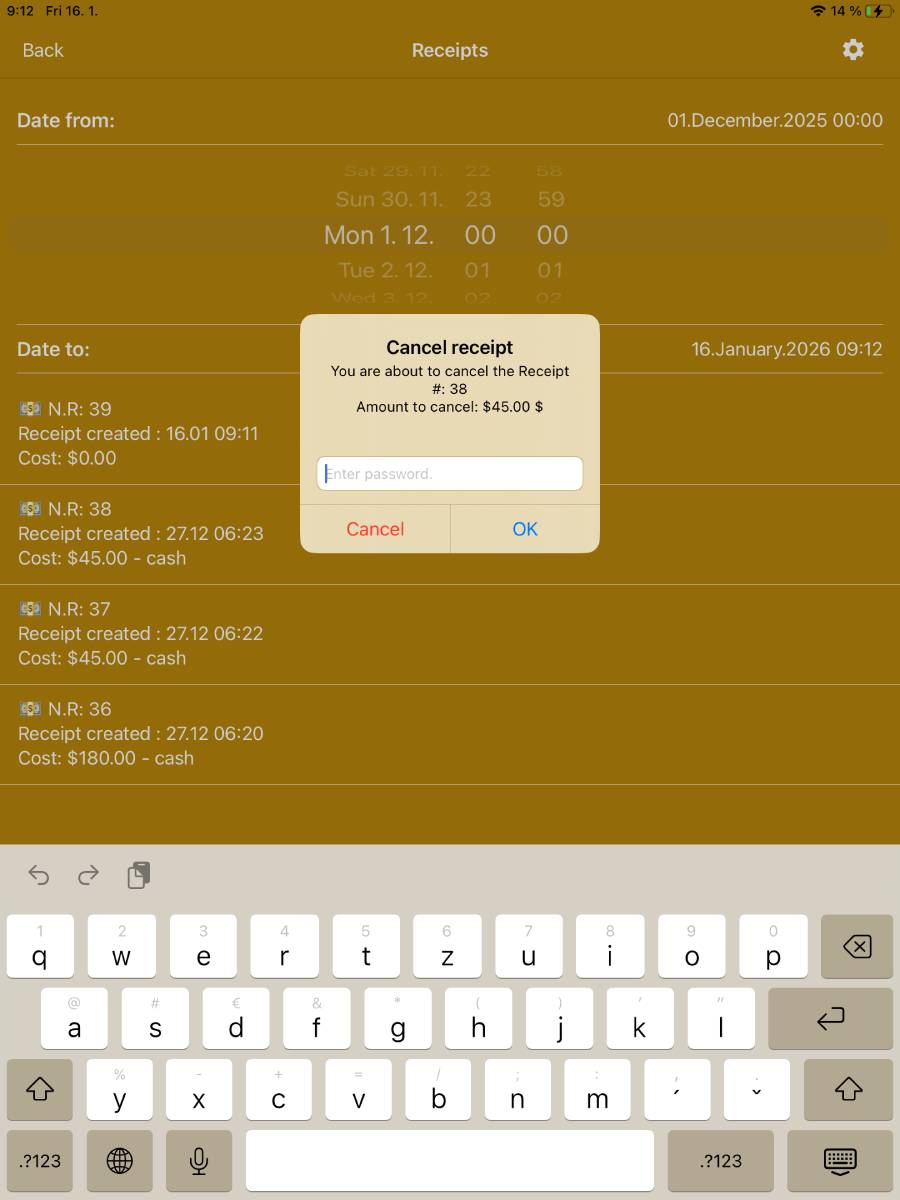
- Cancel
- Cancels the selected account.
- To cancel you must enter the user password.
- The cancelled receipt appears in the receipt overview highlighted in colour.
-
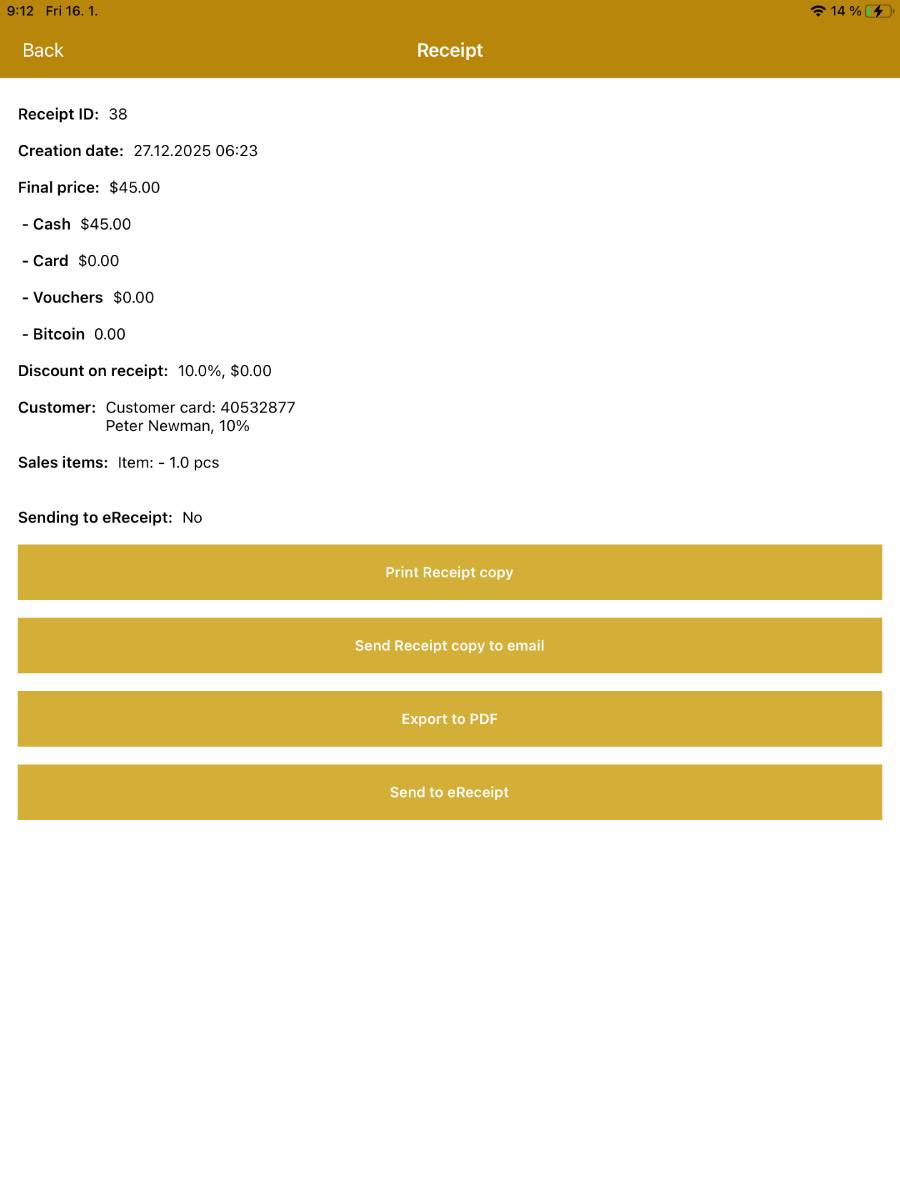
Display shows the receipt details with options:
- Print receipt copy
- Send receipt copy by email
- You fill in the email before sending.
- Export to PDF
- Stores a copy of the receipt on the device.
- Send to eReceipt
- Sends an unsent receipt to the Central cash register.
- This feature requires the eDoklad module to be enabled.
3.2. Settings
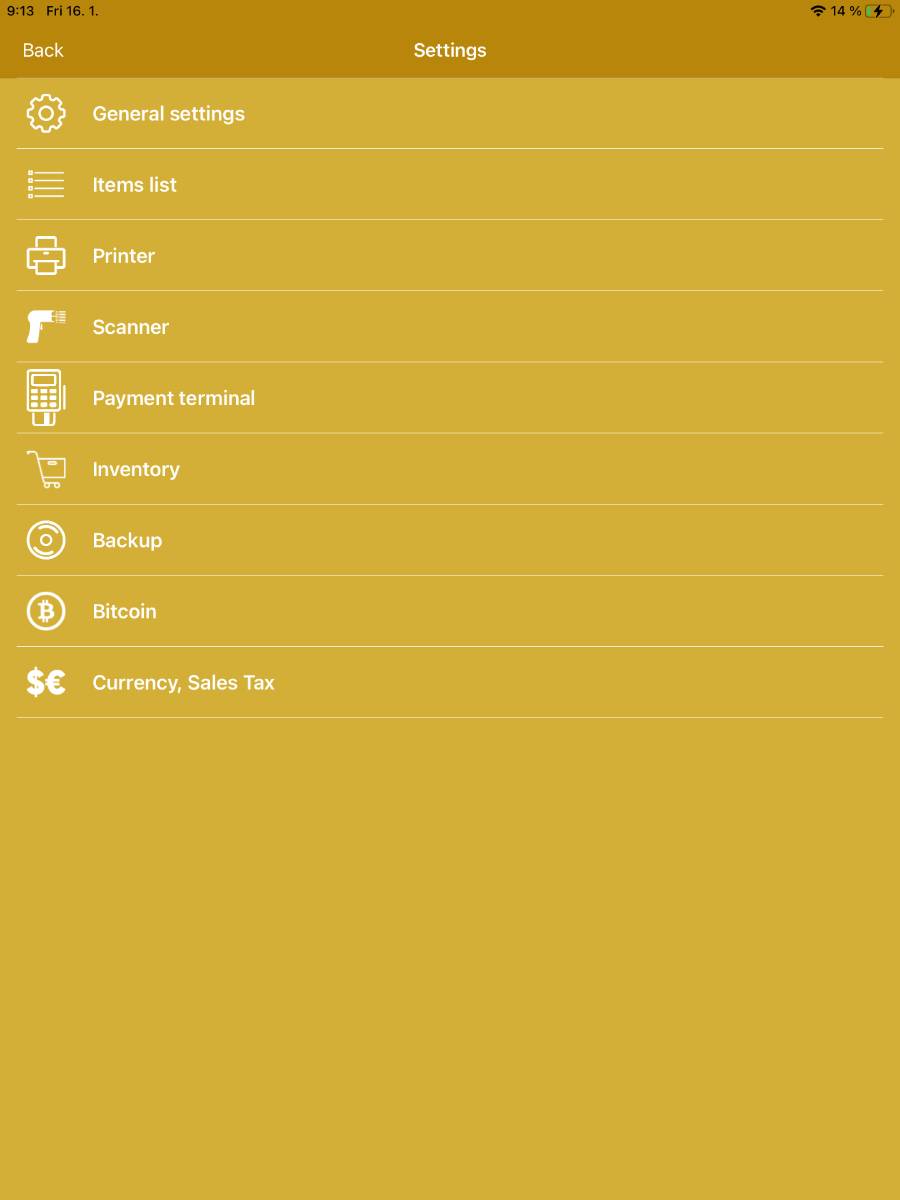
- General settings
- Application settings.
- Items list
- Manage and edit price list items.
- Printer
- Printer settings in the application.
- Scanner
- Settings for the scanner to read EAN codes.
- Payment terminal
- SumUp payment terminal settings.
- Inventory
- Manage and edit inventory items.
- Backup
- Settings for data backup from the application.
- Bitcoin
- Settings for Bitcoin payments.
- Currency, Sales tax
- Settings of currencies and VAT rates.
3.2.1. Settings – General
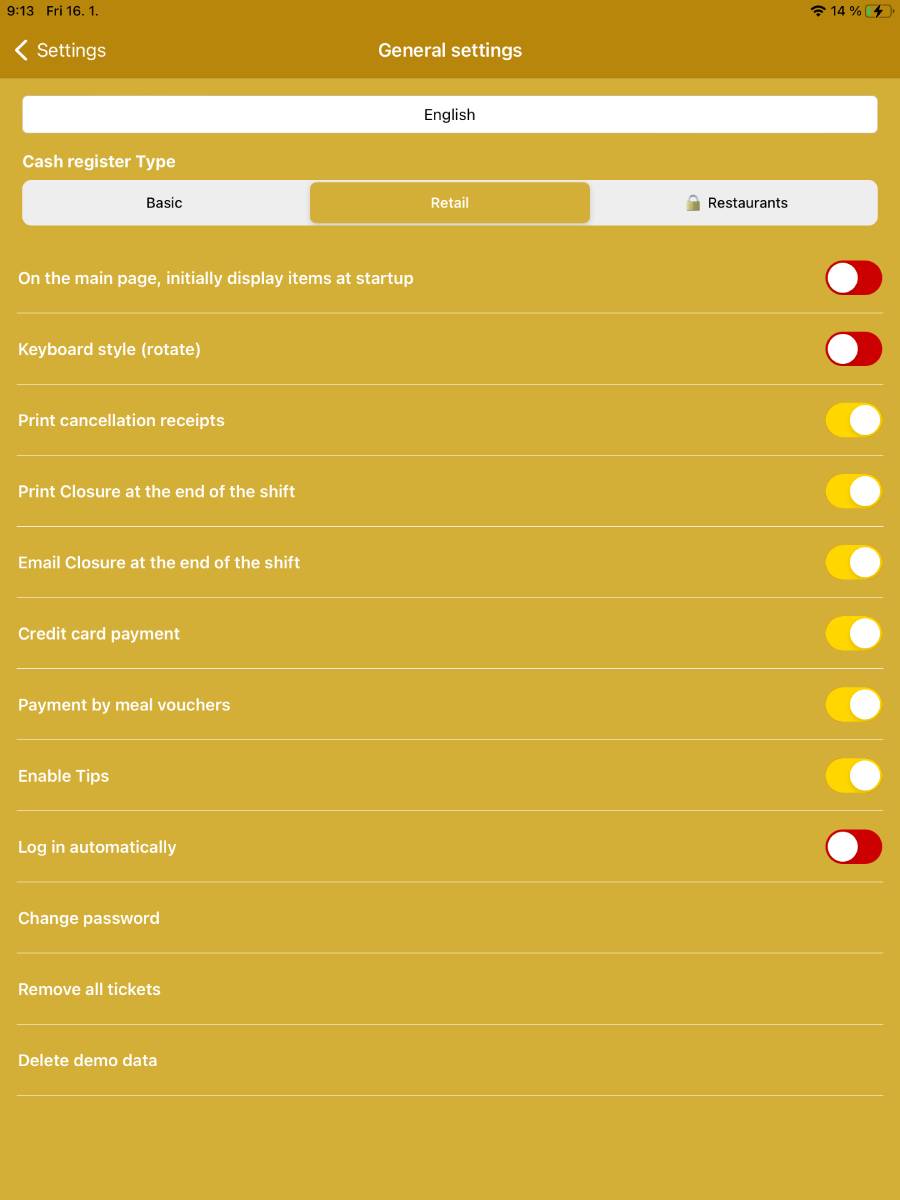
- Cash register type
- Basic - universal cash register mode.
- Retail - if this module is enabled in the application (purchasable Retail extension).
- Restaurants - if this module is enabled in the application (purchasable Gastro extension).
- On the main page, initially display items at startup
- Displays price list items instead of the numeric keypad for entering manual sales.
- Keyboard style (rotate)
- Choose the appearance of the numeric keypad for entering amounts.
- Print cancellation receipts
- Enables printing a cancelled receipt.
- Print Closure at the end of the shift
- Enables printing the closure when ending the shift.
- Email Closure at the end of the shift
- The closure is sent to the configured email address.
- Credit card payment
- Displays the CARD button in the account closure dialog.
- Payment by meal vouchers
- Displays the VOUCHERS button in the account closure dialog.
- Enable Tips
- Allows entering a tip in the account closure dialog.
- Log in automatically
- Enabling this results in automatic login to the application upon launch.
- Change password
- Option to set a different login password for the application.
- Remove all tickets
- Deletes all tickets from the application database.
- Delete demo data
- Appears instead of “Create demo data” when demo data are already created and you want to remove them from the application.
3.2.2. Settings – Price list
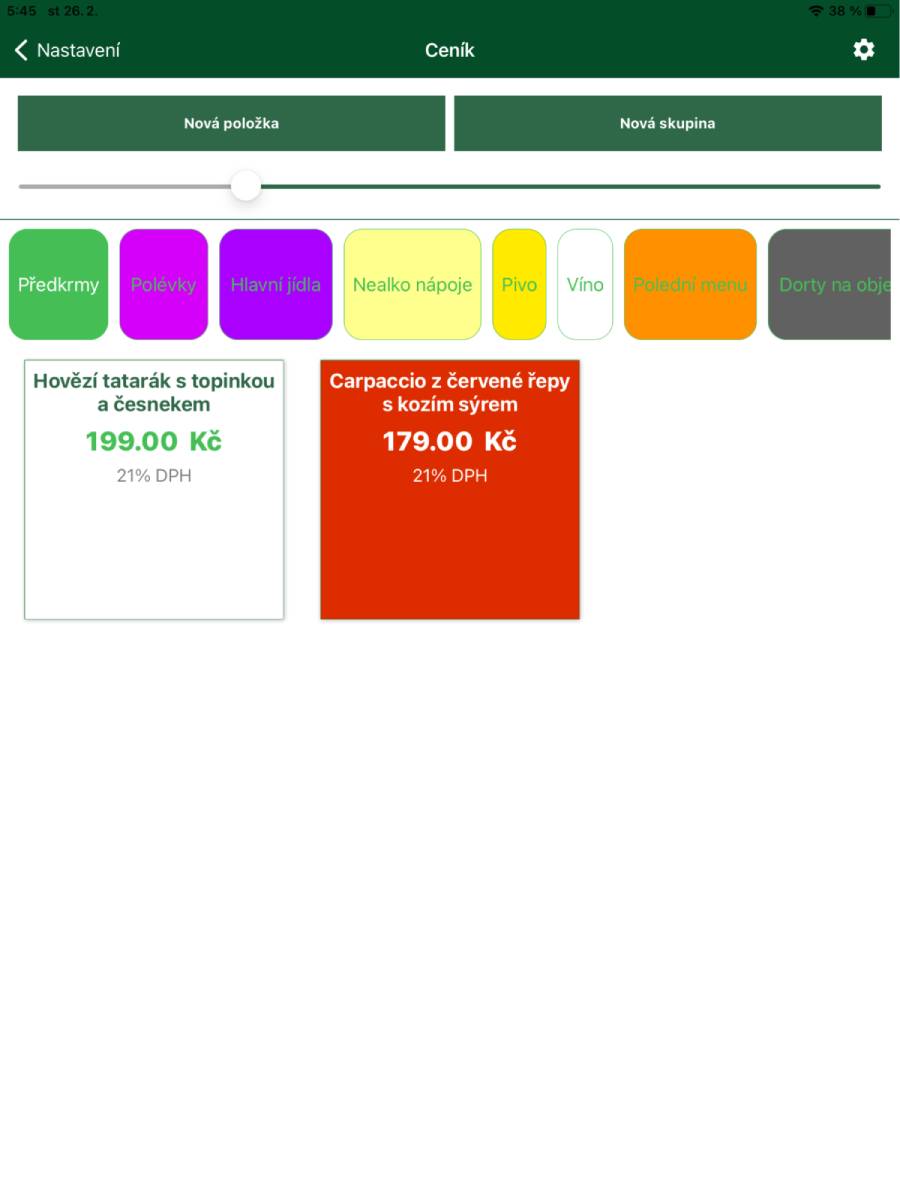
- Basic overview of the price list categories and price list items.
- You create a new price list item using the New item button.
- You create a new price list category using the New group button.
- The size of the buttons (price list items) is set using the slider.

- Create price list item
- Name
- Appears in the application and on the receipt.
- Cost
- Sales price including VAT, shown in the application and on the receipt.
- Manual cost entry
- By enabling this option you can enter the sales price before adding the item to the account.
- Request quantity count
- By enabling this option you can specify the quantity before adding the item to the account.
- Sales TAX
- Set sales tax rate when selling the item.
- Unit
- Unit in which the item is sold.
- EAN
- You can set the item's EAN using the device's camera via the Take photo button.
- Description
- Text field to enter a description of the price list item.
- Group
- Set the price list group; this is the group in which the item appears in the application.
- Active
- Switch to activate/deactivate the item – deactivating does not delete it.
- Background colour
- Allows you to set the background colour of the item in the application.
- OK
- Save the changes made.
- Name
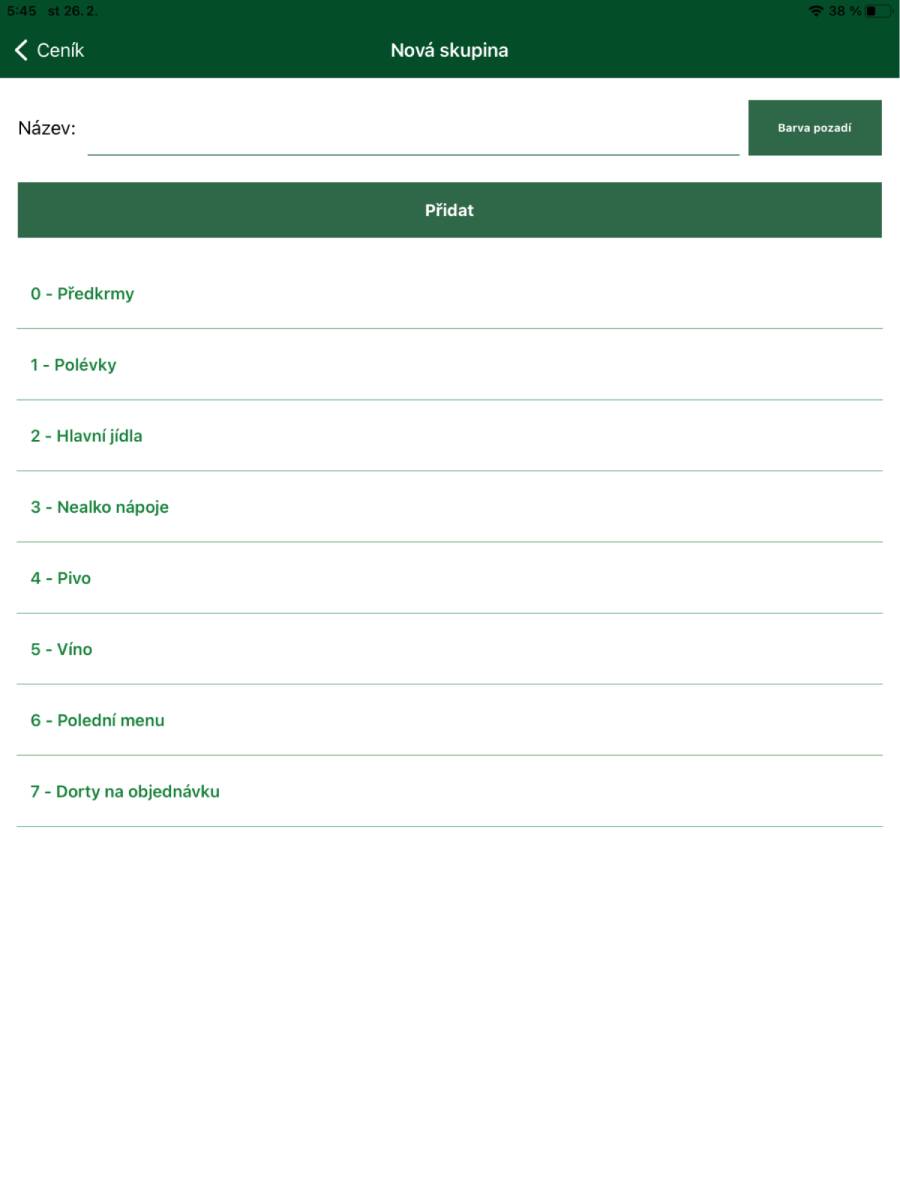
- Create price list category
- Enter the category name in the Name field.
- Background colour
- Allows you to set the background colour of the category in the application.
- Add
- Saves the changes made.
- Edit price list category
- Click on the category name to open editing options.
-
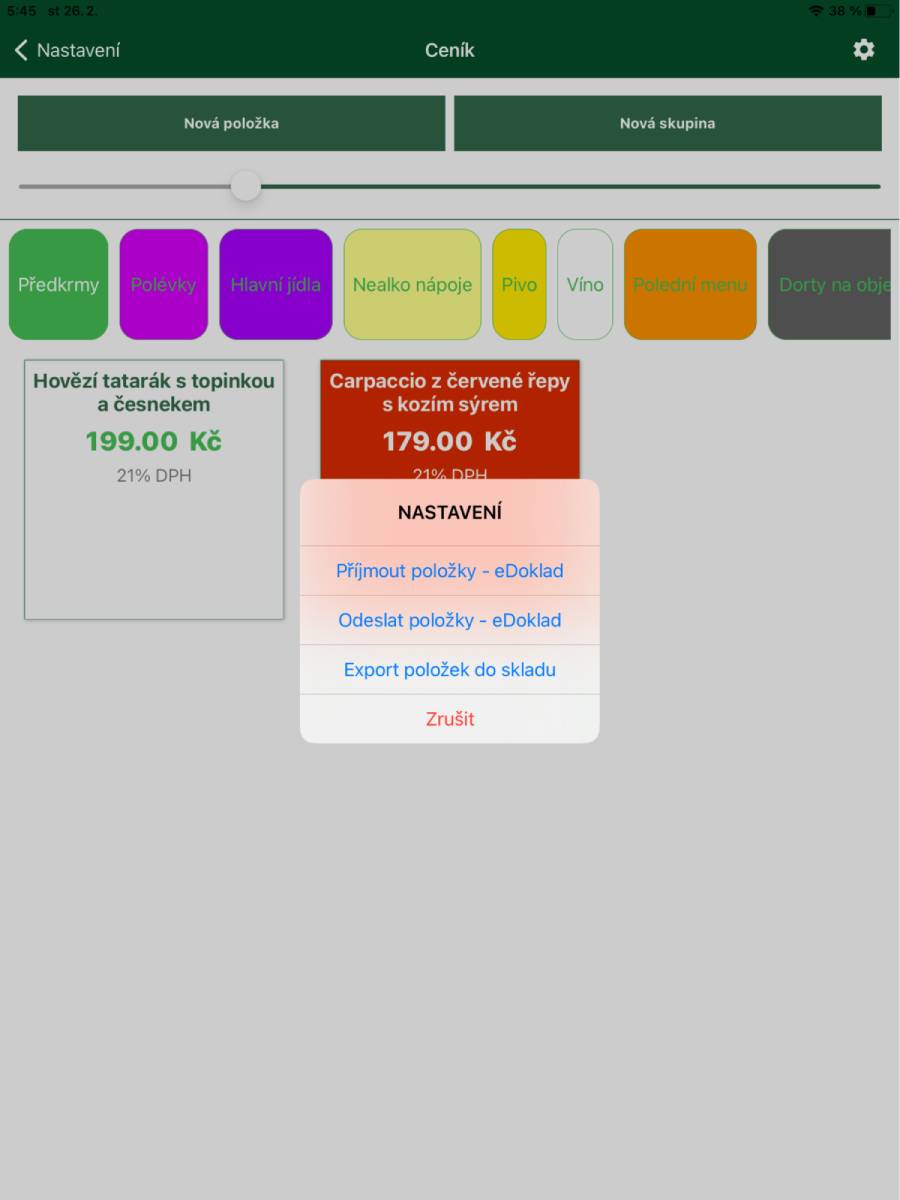
Gear button
Use this button to open the menu for additional functions
- Accept items – eDoklad
- Imports price list items from eDoklad and overwrites the current data in the price list.
- Send items – eDoklad
- Sends changes to price list items to eDoklad.
- Export items to inventory
- Creates inventory items 1:1 with the price list items.
- Accept items – eDoklad
3.2.3. Settings – Printer
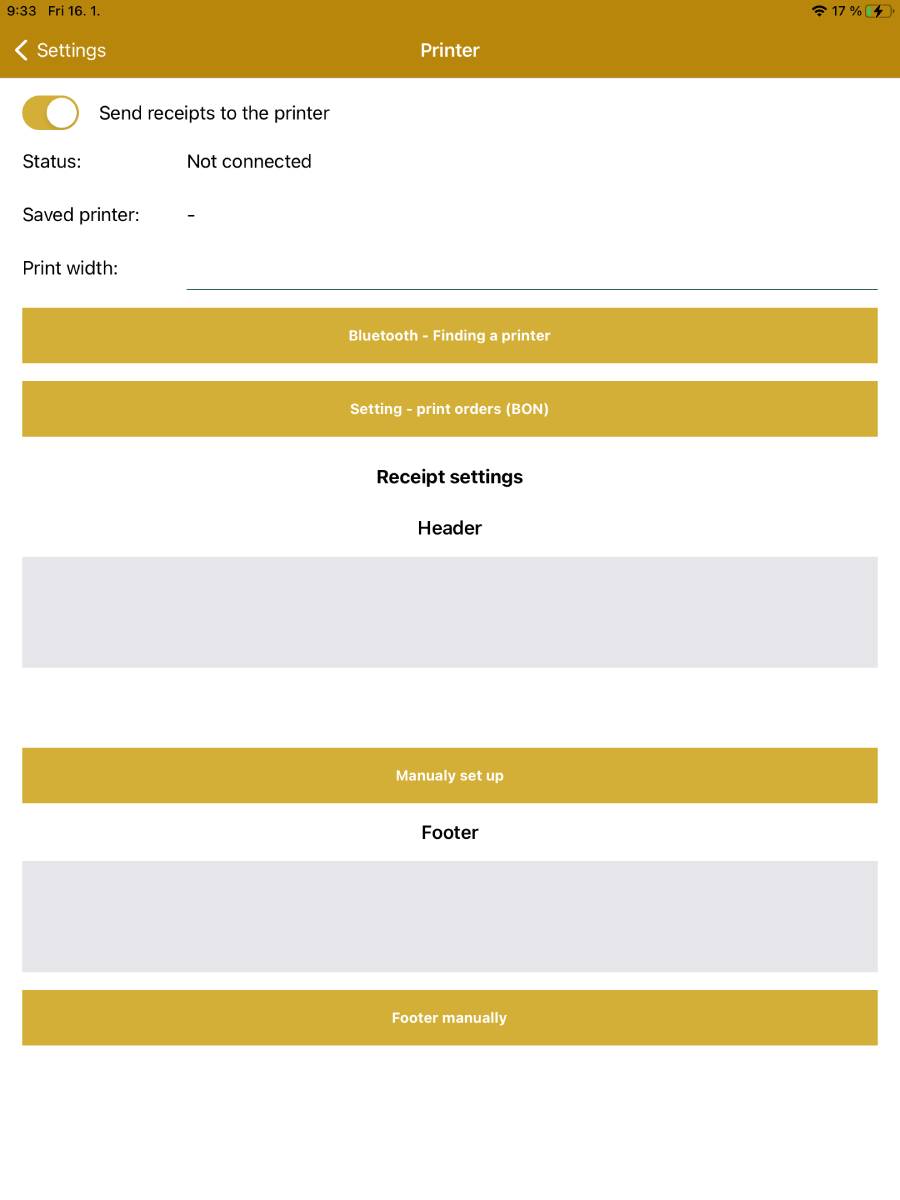
- Send receipts to the printer
- Switch to enable printing receipts.
- Status
- Shows the status of the connected printer.
- Saved printer
- Displays the name of the saved printer.
- Print width
- For 80 mm printers set the value to 46.
- Bluetooth – finding a printer
- Used to search for a Bluetooth printer – displays a list of all available Bluetooth devices nearby.
- Settings – print orders (BON)
- Settings for printing orders (kitchen BONs).
- Receipt header
- Option to set the header manually or download data from ARES and then edit it.
- Receipt footer
- Option to set the footer manually.
- Test receipt
- Prints a test receipt on the configured printer.
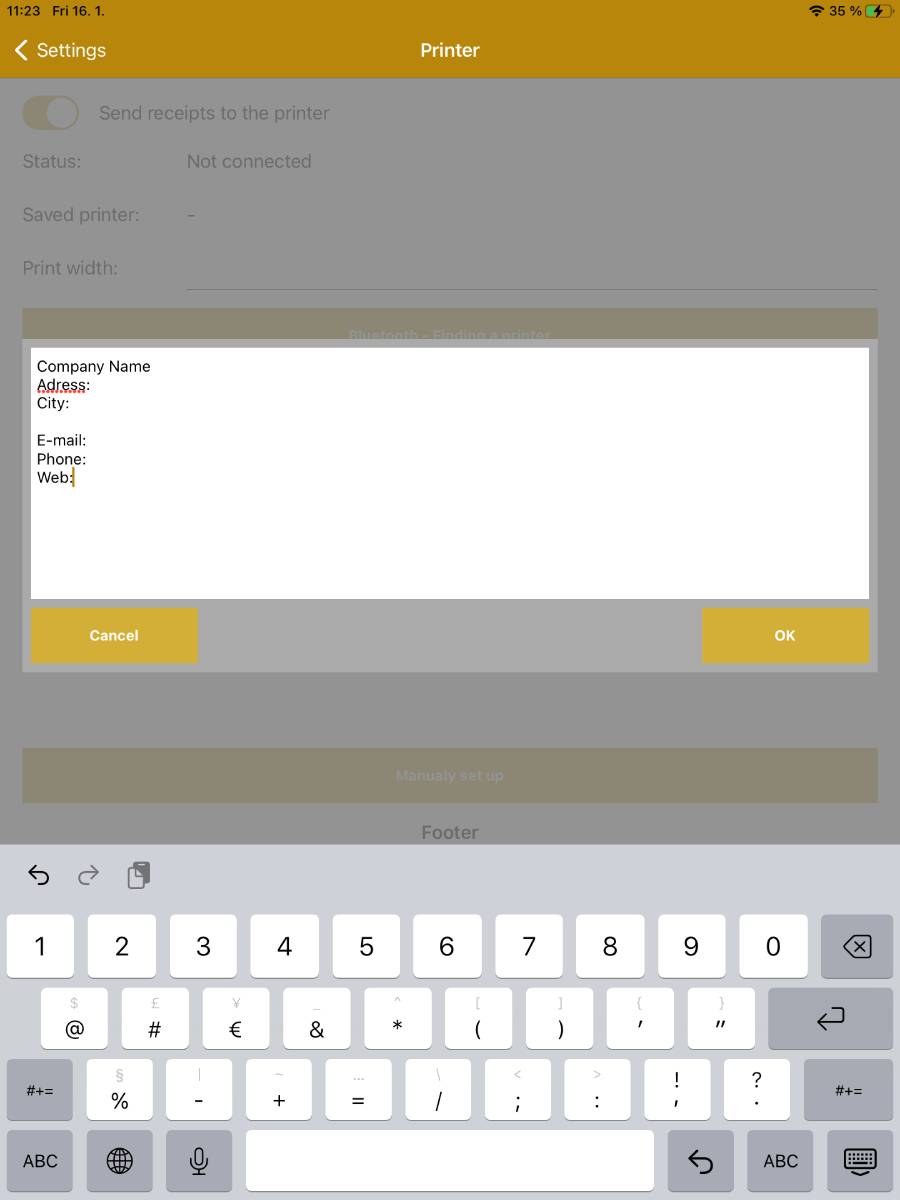
- Settings – Receipt header/footer
- Set in a dialog window; changes are saved using the OK button.
- The change is then visible in the corresponding field in the application.

- Settings – print orders (BON)
- Print orders (BON)
- Switch to enable printing orders.
- State
- Shows the status of the connected printer.
- Saved printer
- Displays the name of the saved printer.
- Printer name
- Option to set your own name to distinguish multiple printers for printing orders (Bar/Kitchen).
- Print width
- For 80 mm printers set the value to 46.
- Finding a printer
- Used to search for a Bluetooth printer – displays a list of all available Bluetooth devices nearby.
- Settings – print groups
- Used to specify which price list groups should have orders printed.
- Add printer
- Option to add another printer, e.g., to separate printing orders for the kitchen and the bar.
- Print orders (BON)
3.2.4. Settings – Scanner

- Scanner/camera settings
- Switch to select between a Bluetooth scanner or the device's camera.
- Search scanner
- Used to search for a Bluetooth scanner – displays a list of all available Bluetooth devices nearby.
- Set up scanner
- Displays an image with an EAN code to allow scanner configuration.
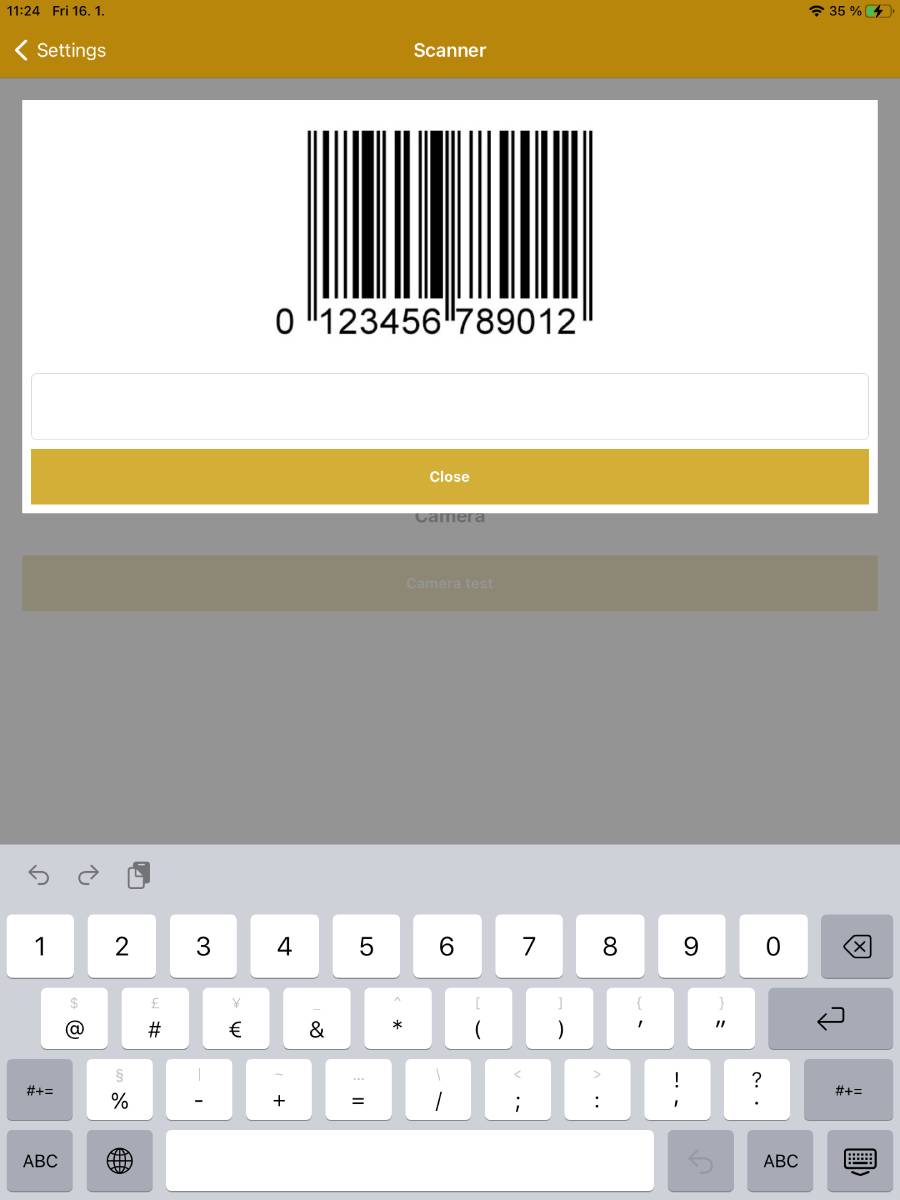
- Scanner test
- Displays an image to test the scanner.
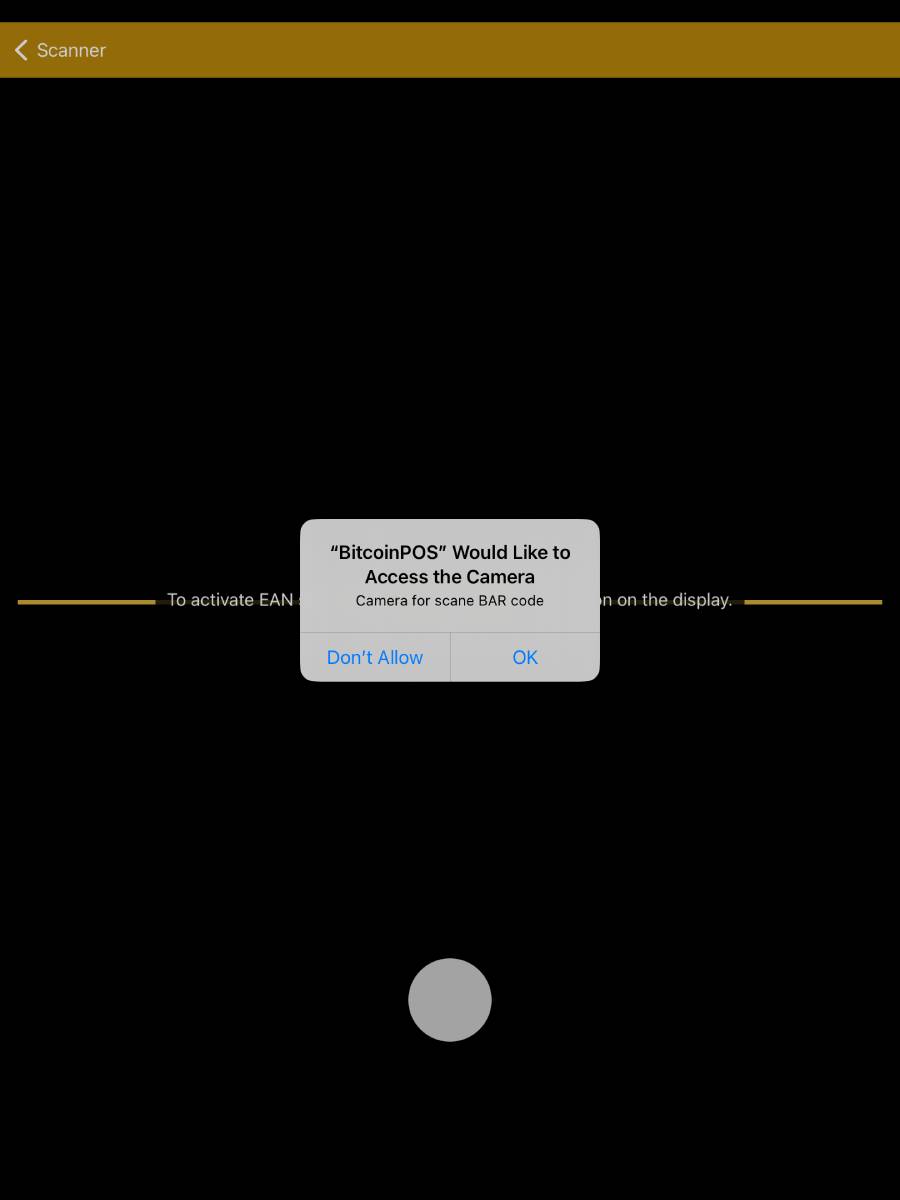
- Camera test
- Before first use you need to allow the app to access the device's camera.
3.2.5. Settings – Payment terminal
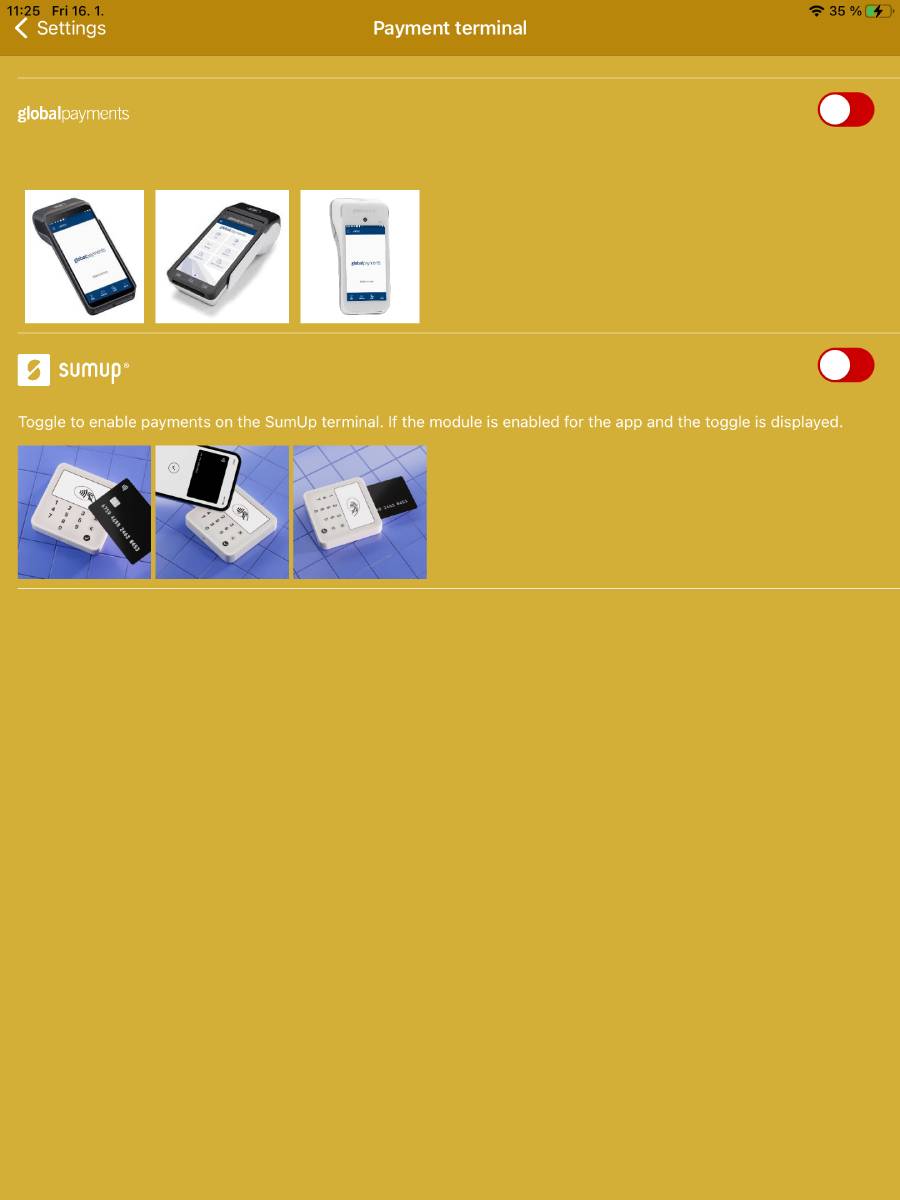
- Use the toggle to enable card payment through the SumUp terminal.
- This function is available through the purchasable module SumUp payments – BitcoinPOS cash register extension .
3.2.6. Settings – Central cash register – eDoklad
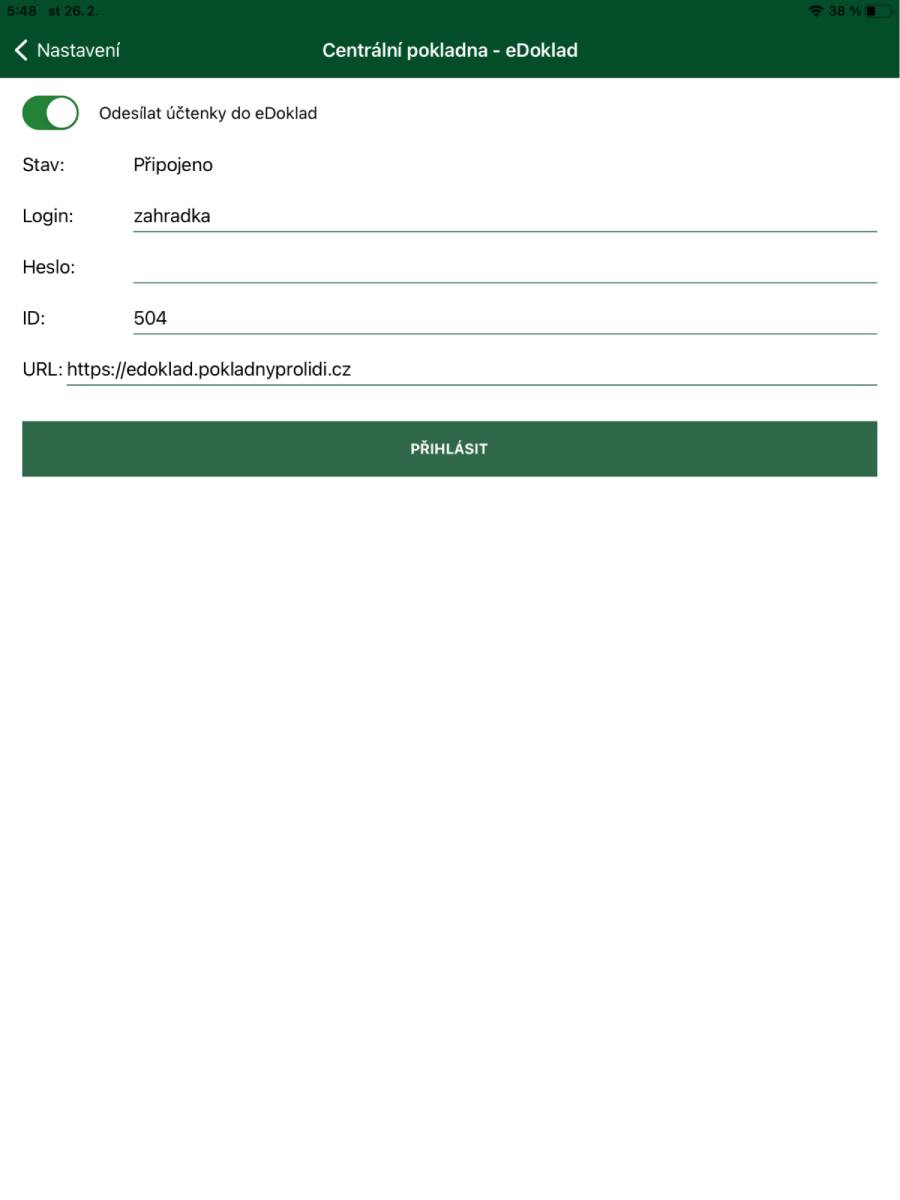
- Additional module for the application – eDoklad – BitcoinPOS cash register extension .
- Send receipts to eDoklad
- Use the switch to allow sending data to the Central cash register – eDoklad.
- Status
- Shows the status of the connection with eDoklad.
- Login
- Enter the login created when registering for eDoklad.
- Password
- Enter the password created when registering for eDoklad.
- ID
- Enter the user ID created when registering for eDoklad.
- URL
- The predefined eDoklad address – do not edit the address as it could cause a problem in communication with eDoklad.
3.2.7. Settings – Inventory management
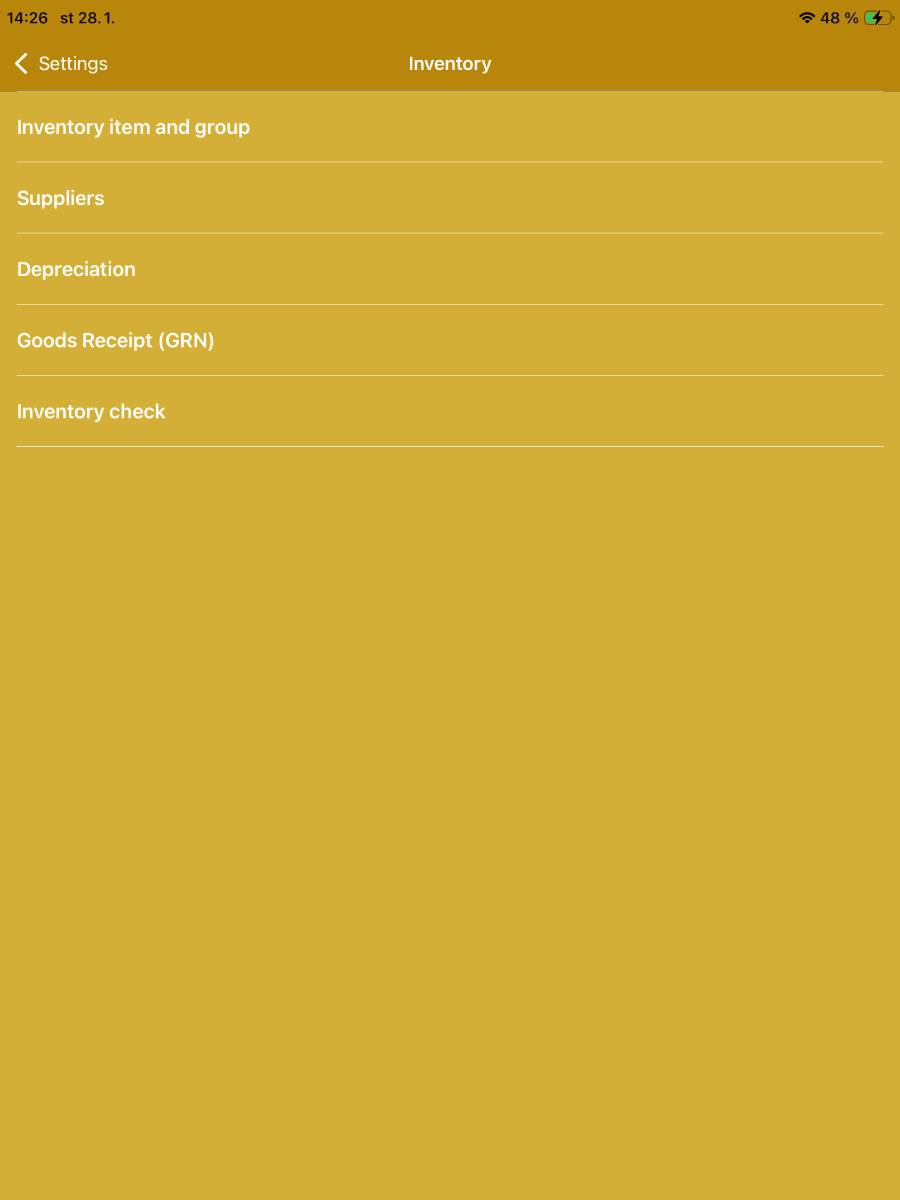
- An add-on module for the application – Inventory – BitcoinPOS cash register extension .
- Inventory items and groups
- Manage and edit inventory items and groups.
- Suppliers
- Manage and edit suppliers.
- Depreciation
- Write-off of expired or otherwise damaged goods.
- Goods receipt
- Stocking inventory items.
- Inventory check
- Inventory of stock items.

- Inventory items and groups
- New item
- Used to create a new inventory item.
- New group / Editing
- Used to create or edit inventory groups.
- Supplier
- Used to create or edit suppliers.
- Inventory items are divided into groups; to expand a group, simply click on its name.
- New item
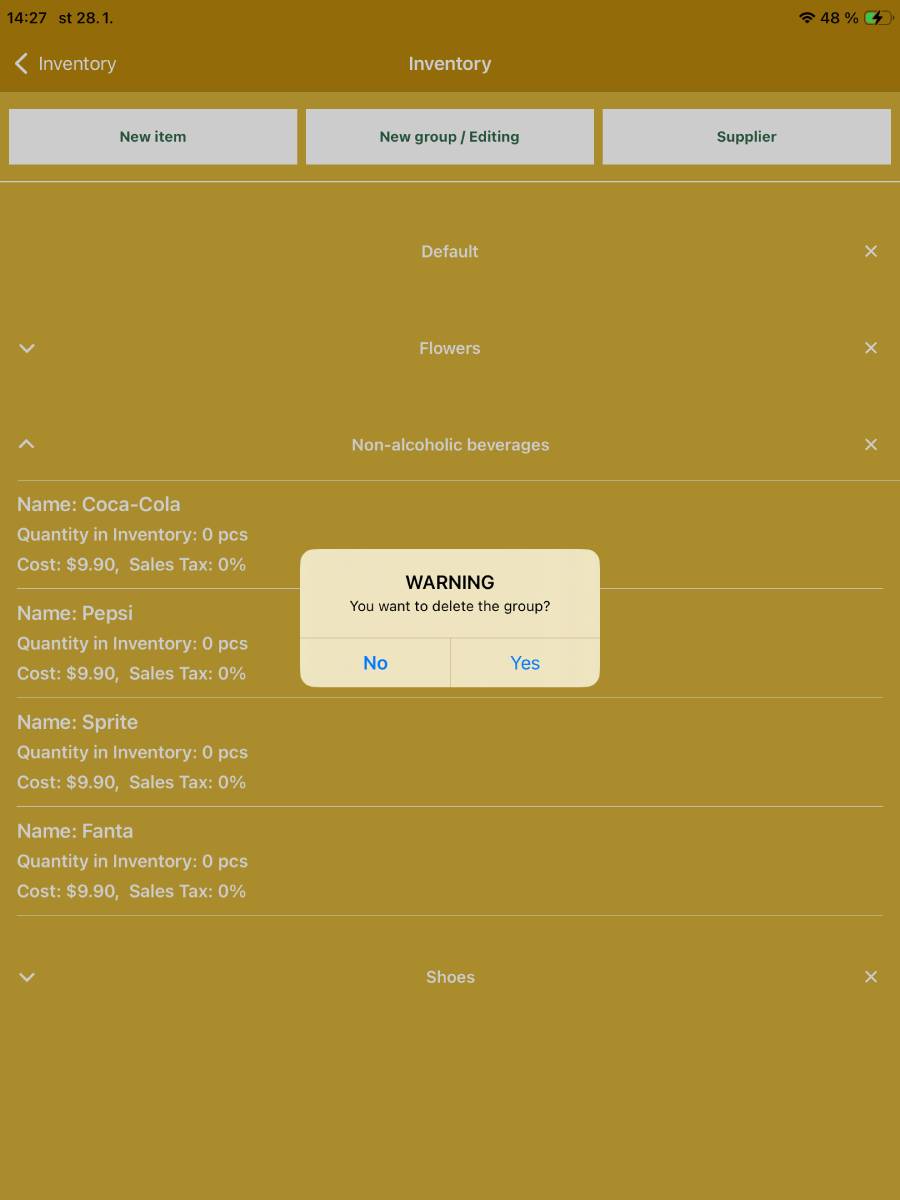
- You can delete an inventory group by clicking the cross symbol and confirming in the dialog.

- Create new item / Edit item
- Name
- Text field for entering the name of the inventory item.
- Cost
- Text field for entering cost including sales tax of the inventory item.
- Count
- Set the quantity of the inventory item.
- Sales TAX
- Set sales tax rate for the inventory item.
- Unit
- Set the unit in which the inventory item should be recorded.
- Units are preset in the application and cannot be edited.
- EAN
- Enter the EAN of the inventory item.
- Option to capture the EAN using the device's camera.
- Description
- Text field to enter a description of the inventory item.
- Group
- Assign the item to an inventory group by selecting from the rollbox of groups defined in the application.
- You can create an inventory group using the + button.
- Supplier
- Select from the rollbox of suppliers stored in the application.
- Active
- Switch to activate or deactivate the inventory item.
- OK button
- Used to save the changes.
- Name
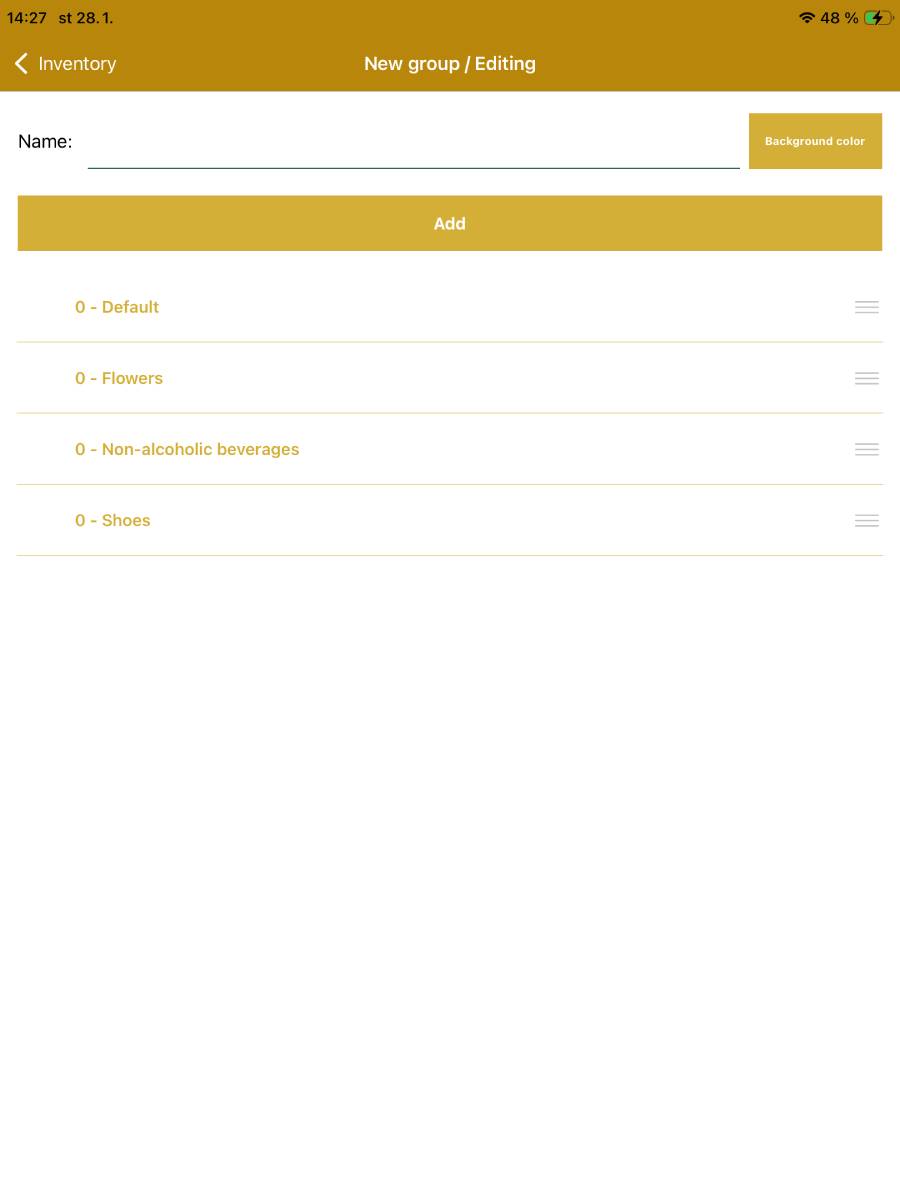
- Create new group / Edit group
- Name
- Text field for entering the inventory group name.
- Add button
- Used to save the changes.
- Inventory groups appear in a vertical list; the order of groups can be changed by dragging a group up or down with your finger.
- Name

- Create new supplier / Edit supplier
- Information can be entered
- Manually by filling in the individual fields.
- OK button
- Used to save the changes.
- Information can be entered
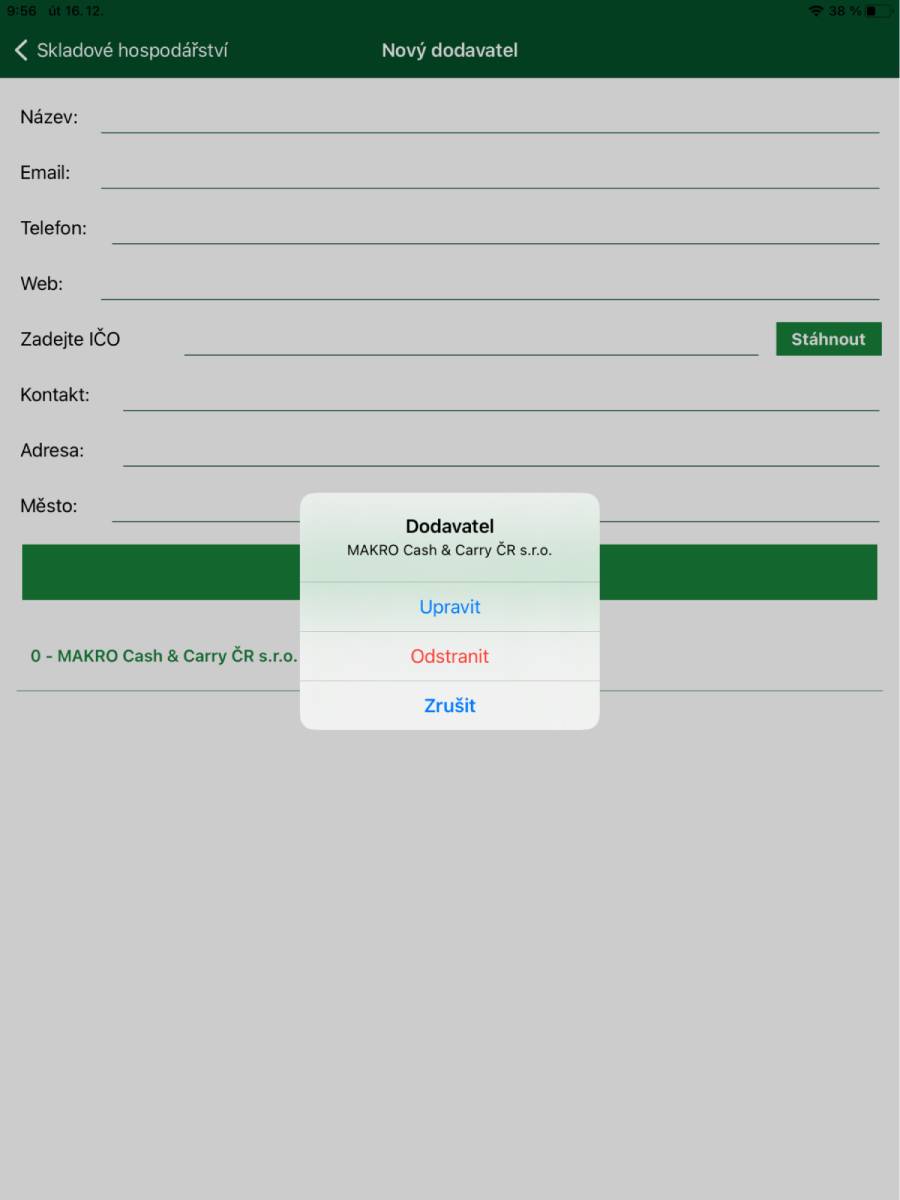
- To edit or remove a supplier you can click on the supplier's name and choose the option in the dialog.

- Depreciation
- Write‑off of inventory items not for sale (damaged goods)
- New Depreciation
- Create a new Depreciation.
- Date
- Filter write‑offs by creation date.
- User
- Filter write‑offs by the user who recorded the write‑off.
- Type
- Filter write‑offs by the reason or type.
- Entered write‑offs are displayed in a list; clicking the Depreciation name also shows the items written off.
- New Depreciation
- Write‑off of inventory items not for sale (damaged goods)
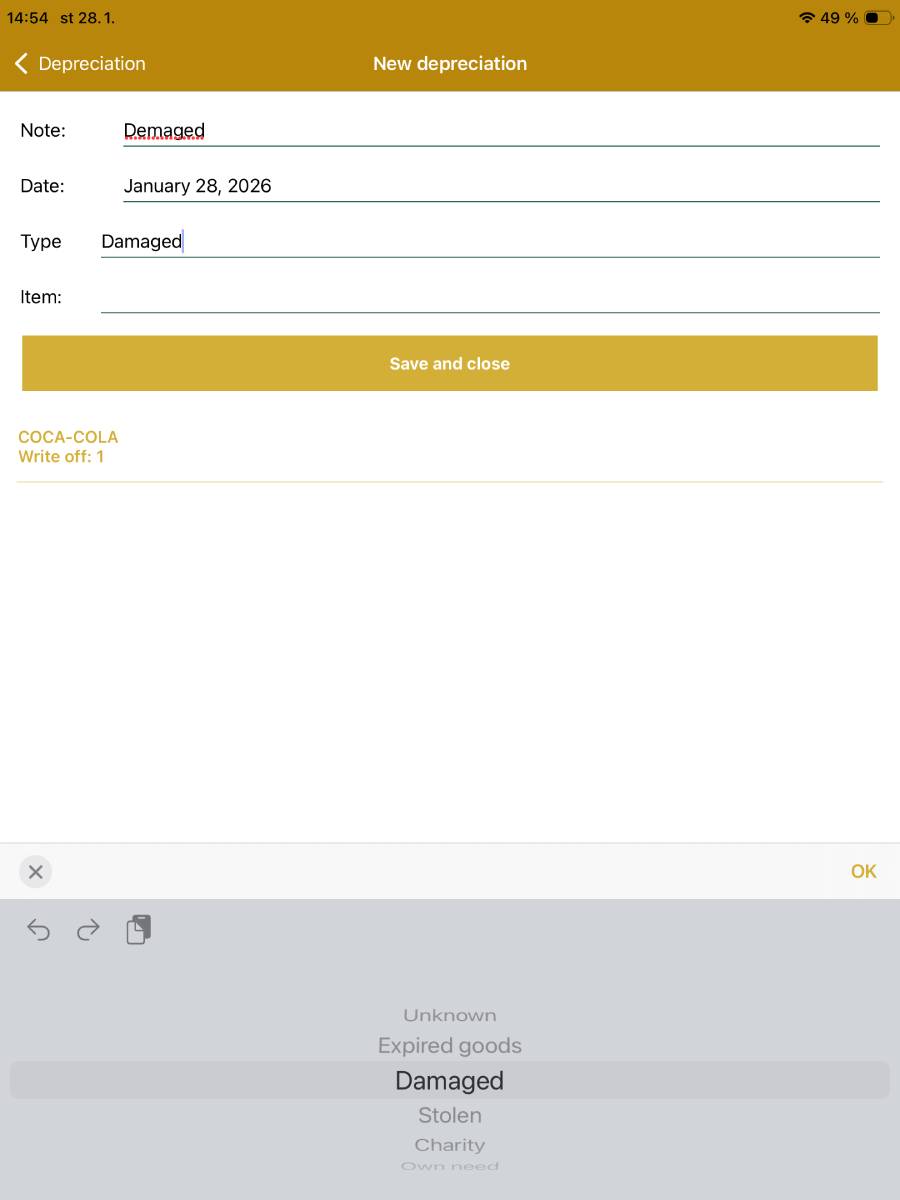
- New Depreciation
- Note
- Displayed in the write‑off overview, used to better identify the write‑off – e.g., “Damaged during handling”.
- Date
- Date of the write‑off, automatically set to the current date.
- Type
- Select the type of write‑off from a drop‑down list, e.g., Expired goods, Damaged, etc.
- Item
- Select the inventory item to be written off by progressively entering its name.
- After confirming the selection the item will be added to the write‑off in a quantity of 1.
- Save and close
- The entered items are written off from inventory; the write‑off is saved for possible future inspection.
- Note
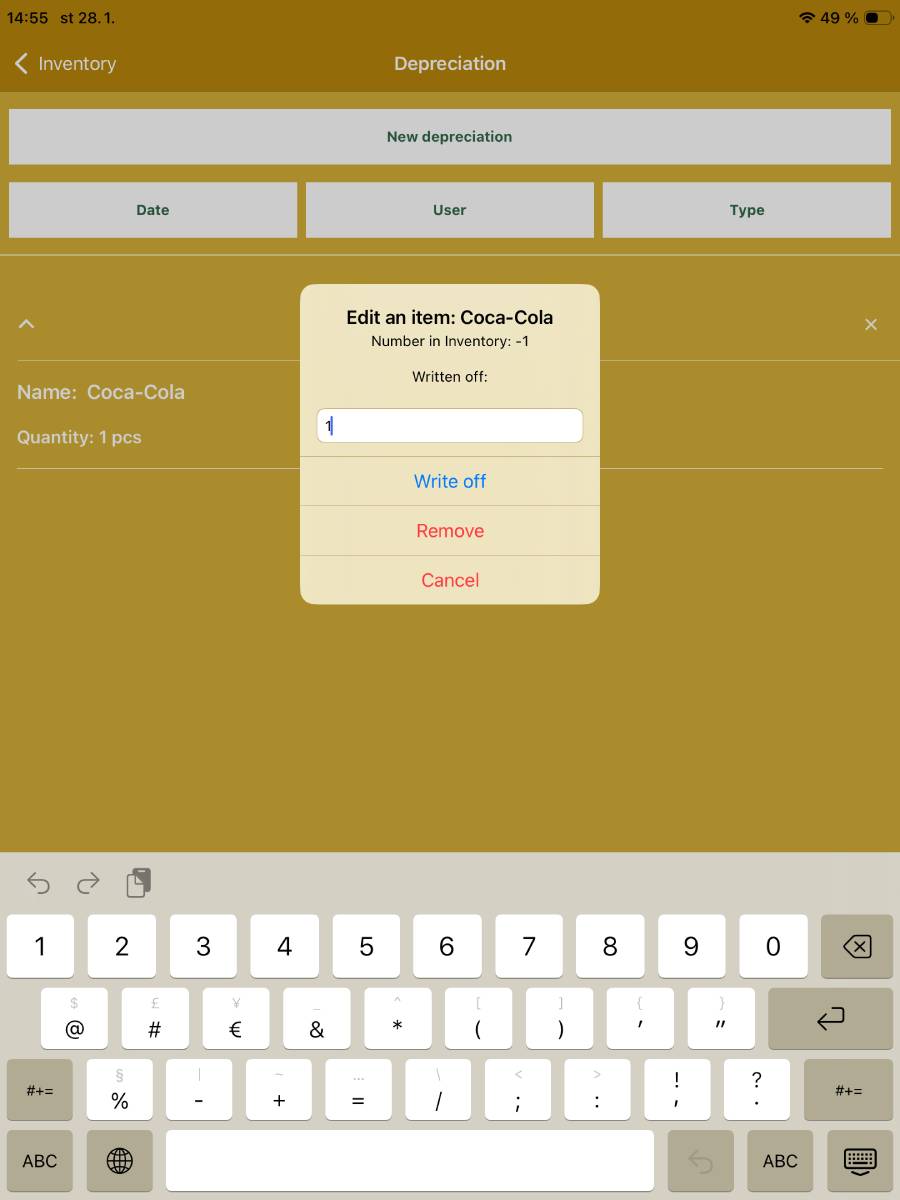
- To change the quantity, click on the item and adjust the quantity in the dialog window.
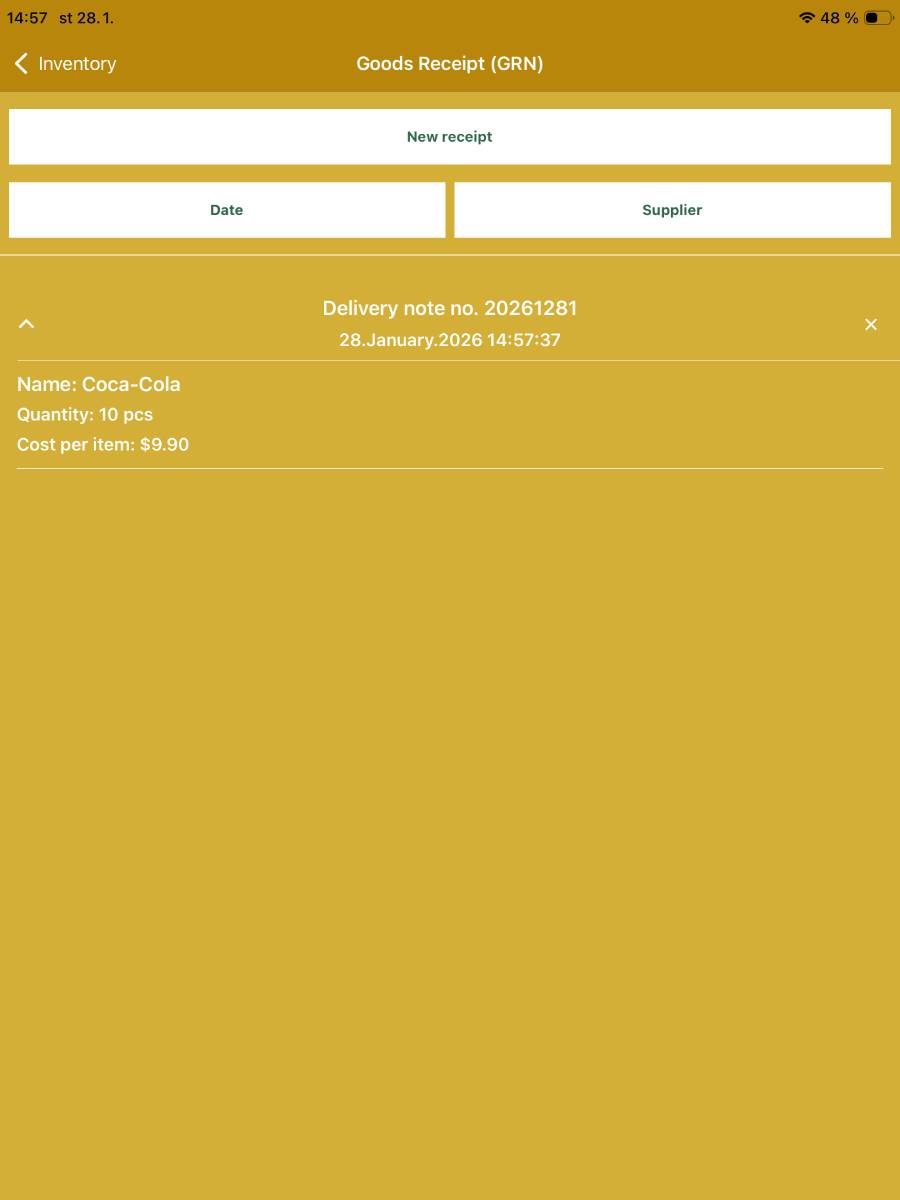
- Goods receipt
- Receiving goods into inventory
- New receipt
- Create a new goods receipt.
- Date
- Filter receipts by creation date.
- Supplier
- Filter receipts by supplier.
- Entered goods receipts are displayed in a list; clicking the goods receipt name also shows the received items.
- New receipt
- Receiving goods into inventory
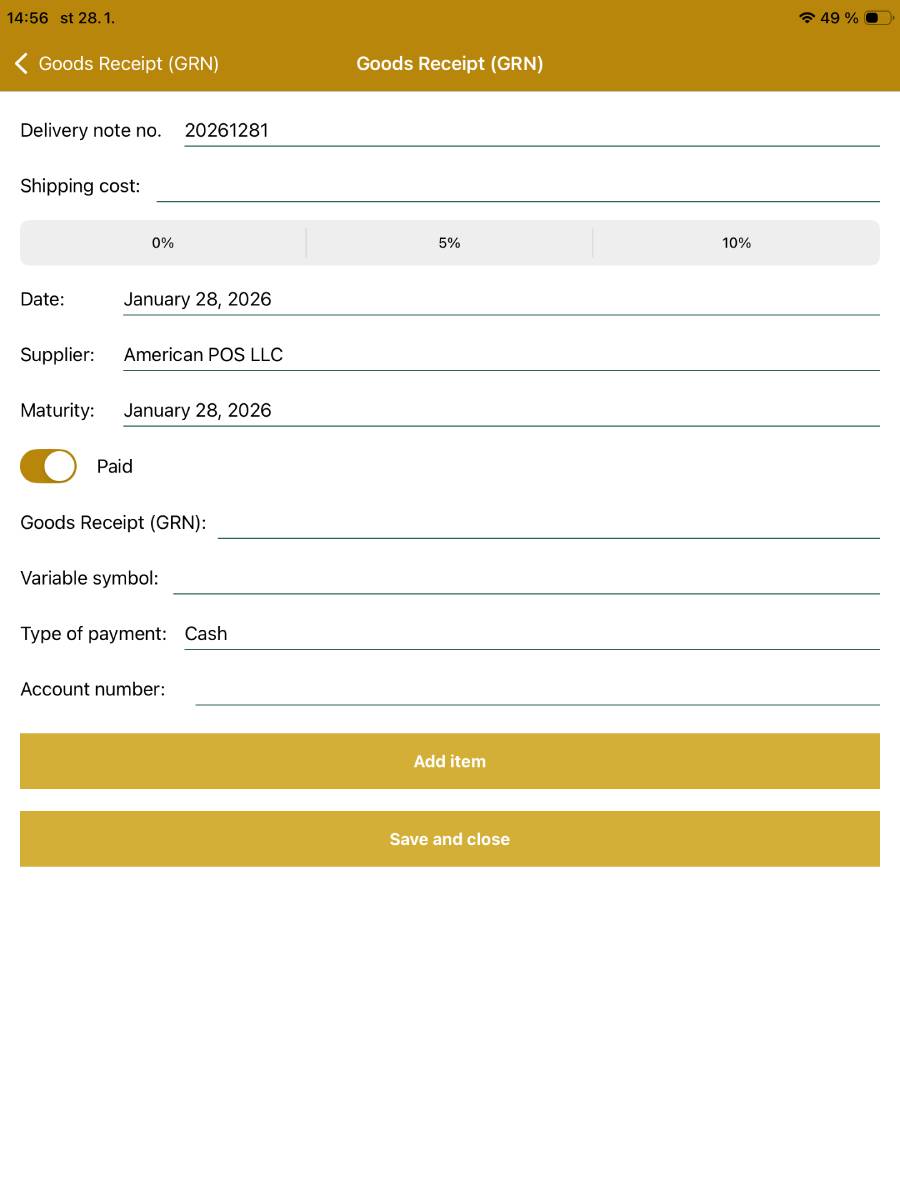
- New goods receipt
- Delivery note no.
- Automatically filled in with a predefined format; you can change the values.
- Shipping cost
- Shipping cost according to the invoice or delivery note.
- Sales tax
- Set sales tax rate for transport.
- Date
- Date the goods receipt is created; automatically set to the current date.
- Supplier
- Select the supplier from a drop‑down list.
- Maturity
- Maturity of the goods receipt, automatically set to the current date.
- Paid
- Switch indicating whether the goods receipt is paid.
- Goods receipt
- Enter the invoice number for the goods receipt.
- Variable symbol
- Variable symbol.
- Type of Payment
- Select the payment type from the drop‑down list (cash, card or bank transfer).
- Account number
- Account number for payment of the invoice for the goods receipt.
- Add items
- Button to add items to the goods receipt.
- The number of items added to the goods receipt is shown in parentheses on the Add items button.
- Save and close
- Button to save and close the goods receipt.
- Delivery note no.
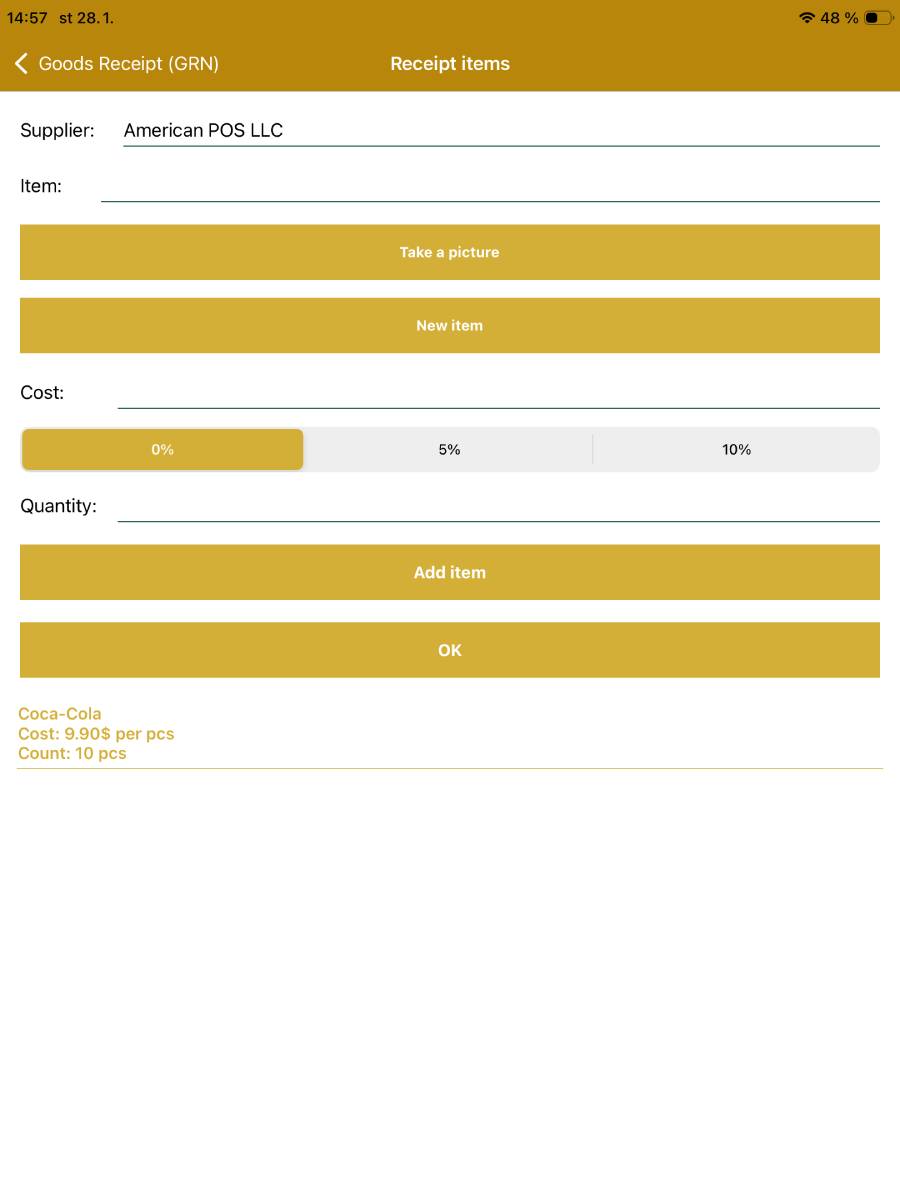
- Add inventory item to goods receipt
- Supplier
- Automatically pre‑filled according to the settings in the goods receipt.
- Item
- Select by gradually entering its name.
- You can also scan the item via its EAN code using the Take picture button.
- New item
- Option to create a new inventory item directly within the goods receipt.
- Cost
- Purchase cost of the item – according to the delivery note or invoice.
- Sales tax
- Slider to set the sales tax rate.
- Quantity
- Number of units of the item according to the delivery note or invoice.
- Add items
- Adds the items to the goods receipt.
- OK
- Ends the process of adding items to the goods receipt.
- Supplier
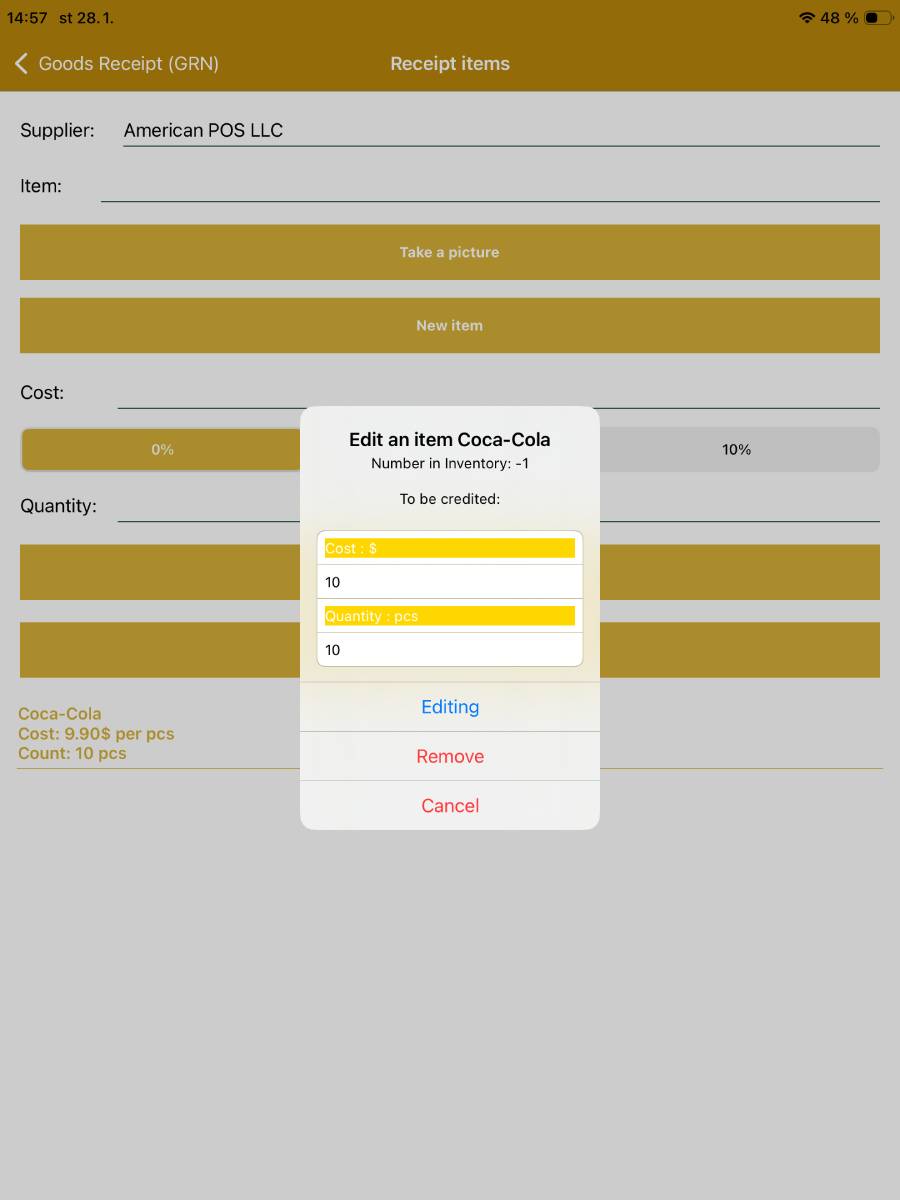
- Items added to the goods receipt can be further edited by clicking on the item name and modifying it in the dialog box.
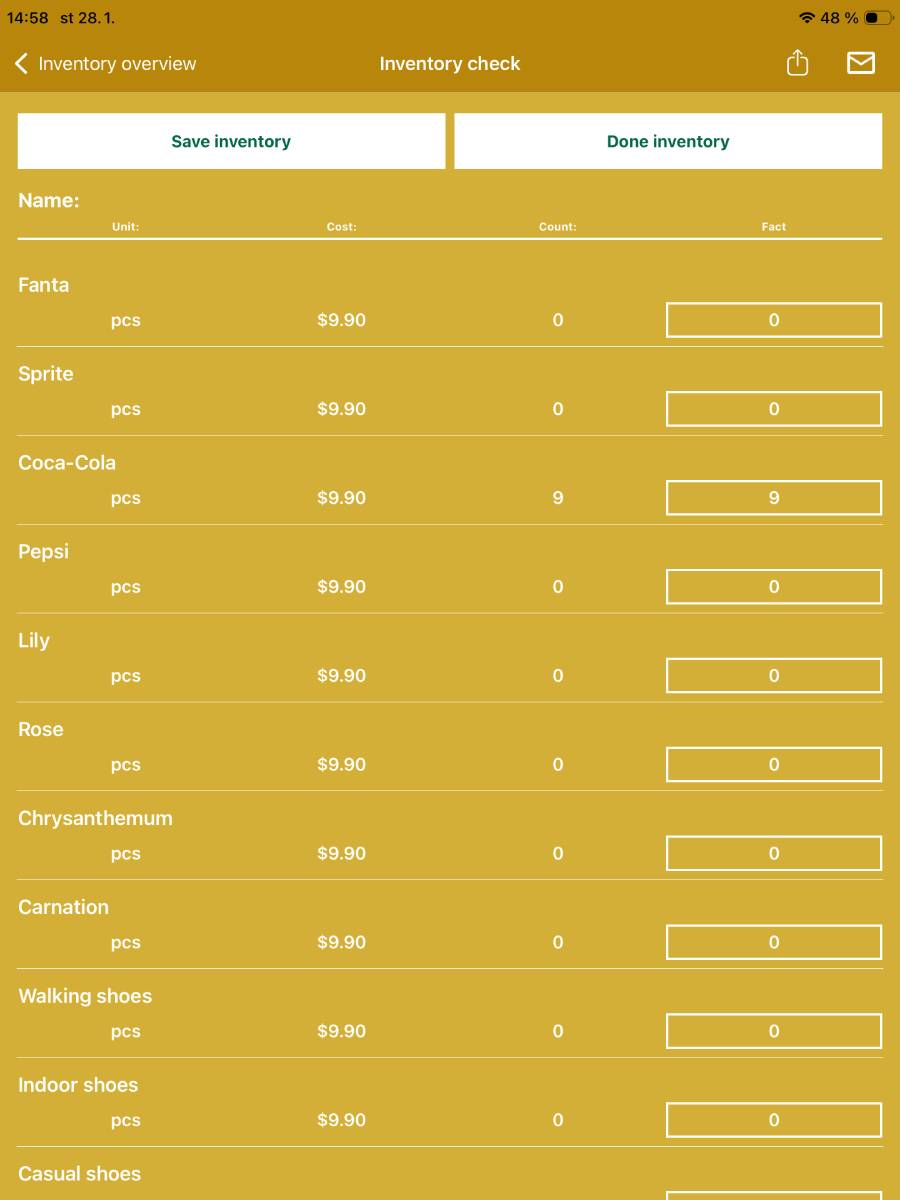
- Inventory check
- Save inventory
- Saves the entered quantities for individual items and updates the stock quantity of these items.
- Done inventory
- Ends the inventory without changing the stock quantity.
- Ending must be confirmed in a dialog window.
-
A work-in-progress or saved inventory can be saved to the device or sent via email

- Save inventory
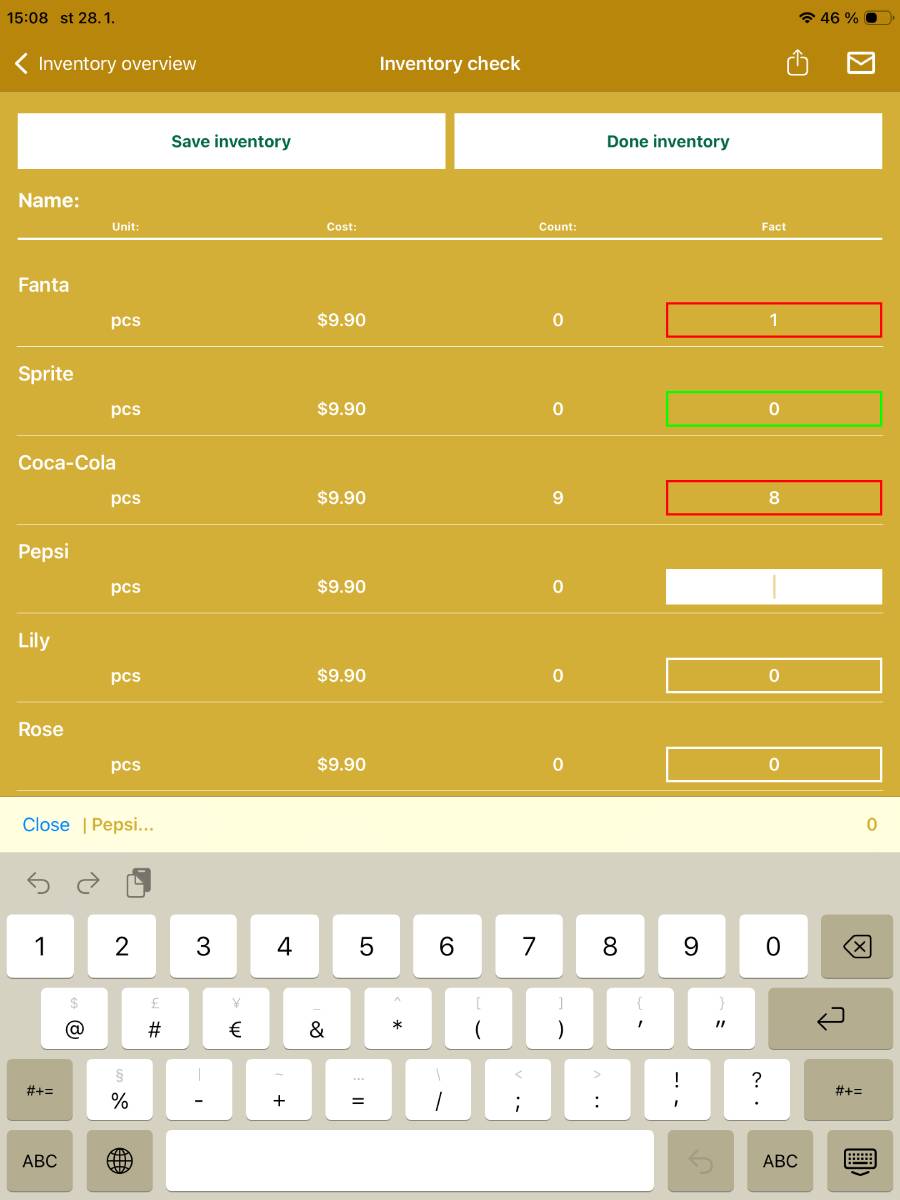
- Inventory items are displayed in a clear table with information:
- Name, Unit, Purchase price, the currently recorded Quantity in stock, and Actual quantity.
- Actual quantity is an editable field used to enter the actual counted quantity of the item.
- Items where there is a difference compared with the recorded quantity are marked in red.
- Items with a matching quantity are marked in green.
3.2.8. Settings – Backups
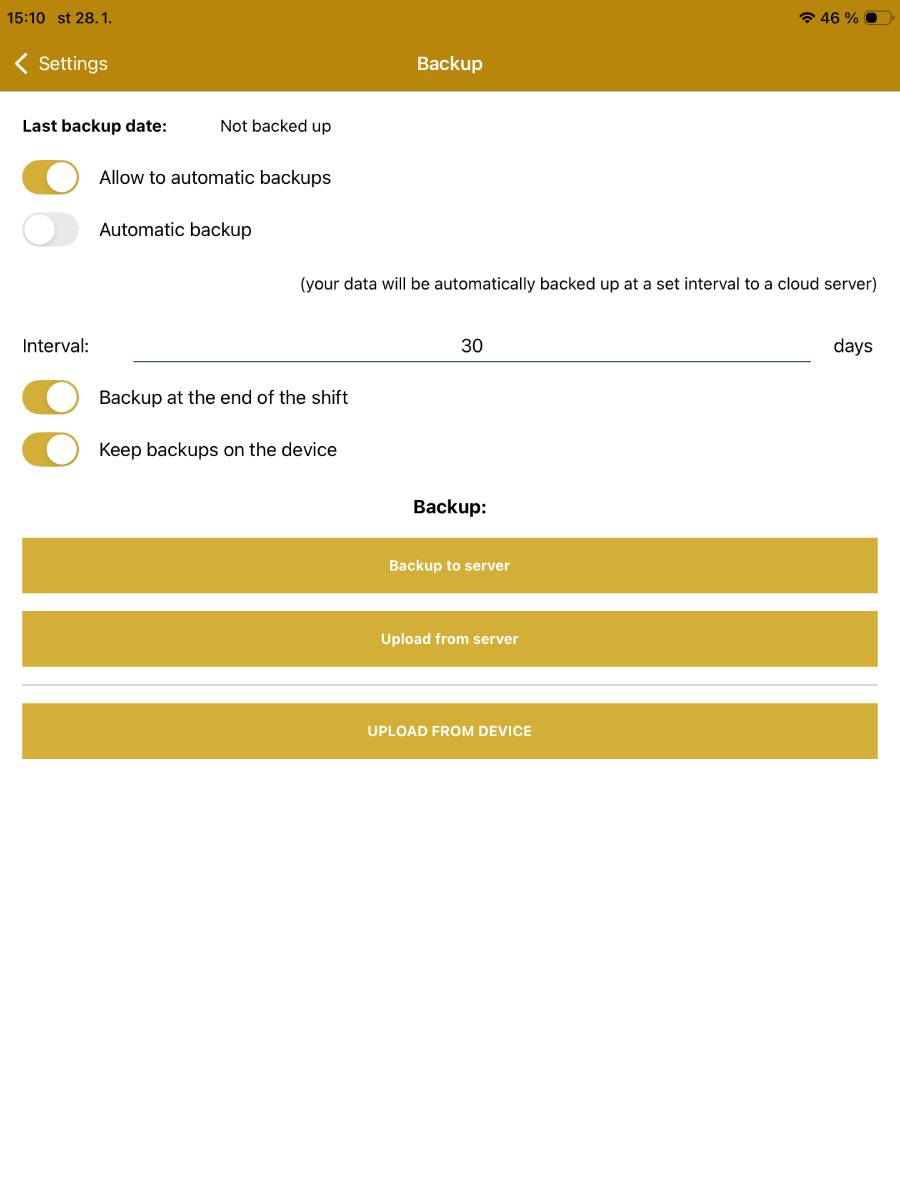
- Allow to automatic backups
- Toggle to agree to automatic backups.
- Automatic backup
- Toggle to enable automatic backups; once activated you can set the backup interval (default 30 days).
- Backup at the end of the shift
- Toggle to have the app create a backup every time you close the shift.
- Keep backups on device
- Toggle to have the app store the backup on the device.
- Backup to server
- Manual export of data to the EkoBit server.
- Upload from server
- Manually restore a data backup from the EkoBit server.
- Upload from device
- Manually restore a data backup from the device.
3.2.9. Settings – Bitcoin
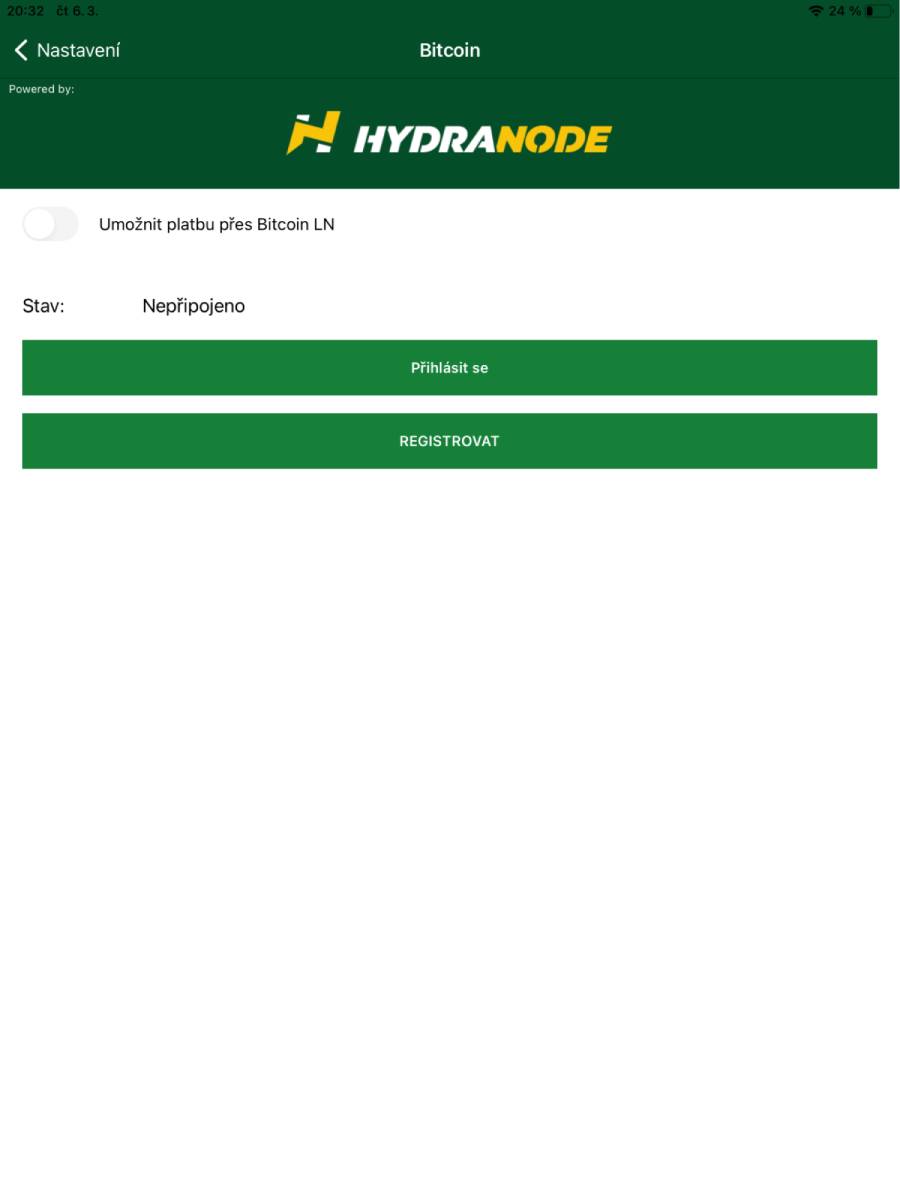
- Settings for Bitcoin payments via the HYDRANODE provider
- If you do not have a user account, continue via the REGISTER button.
- To log into your account use the Log in button.
- The application automatically logs you into the Merchant location created in the app; currently there is no option to log into another account in Hydranode.
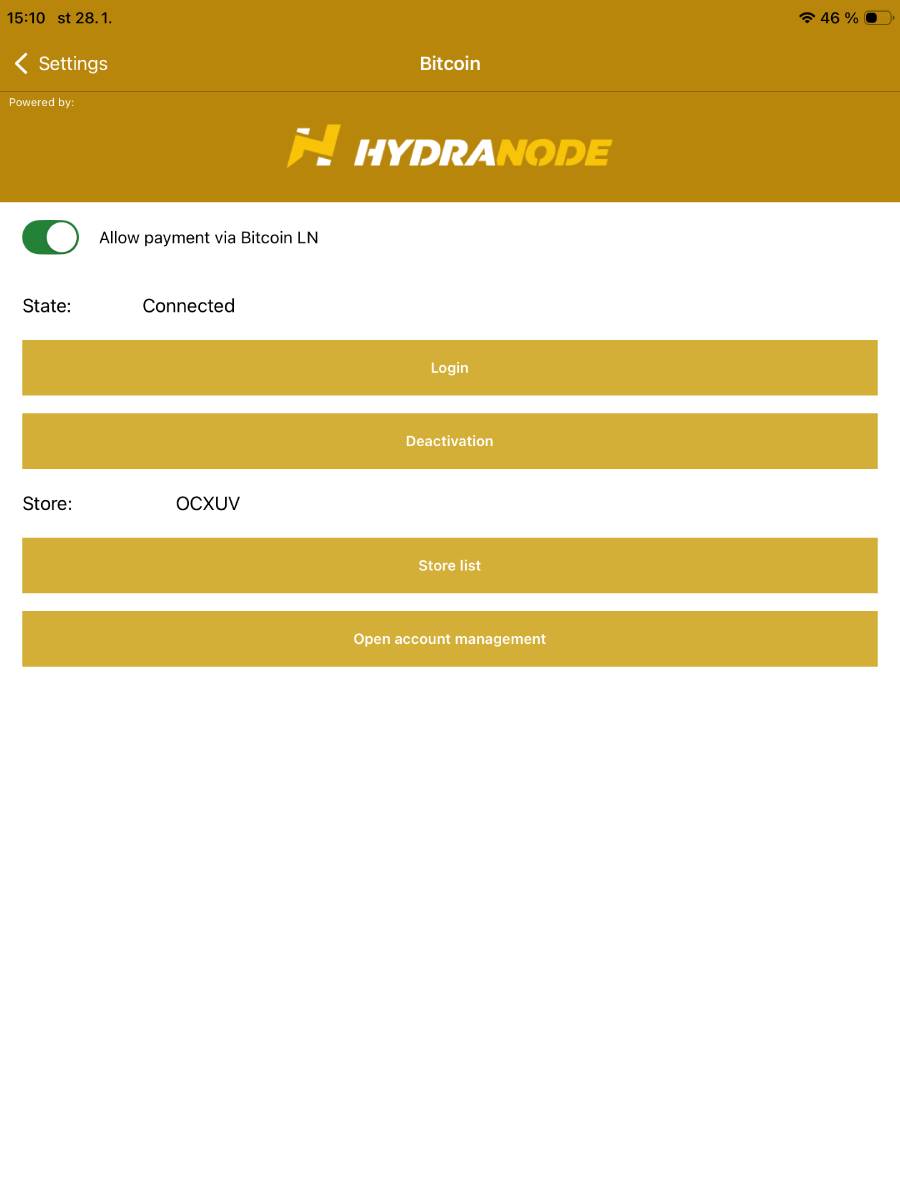
- Allow payments via Bitcoin LN
- You enable BTC payments using a toggle.
- After logging in:
- Status: Connected.
- The currently used Merchant location is displayed.
- List of Stores
- Displays a list of merchant locations created in the application.
- You can add another via the Create merchant location button.
- Open account management
- Opens a web page in the device’s internet browser.
3.2.10. Settings – Currency, Sales TAX
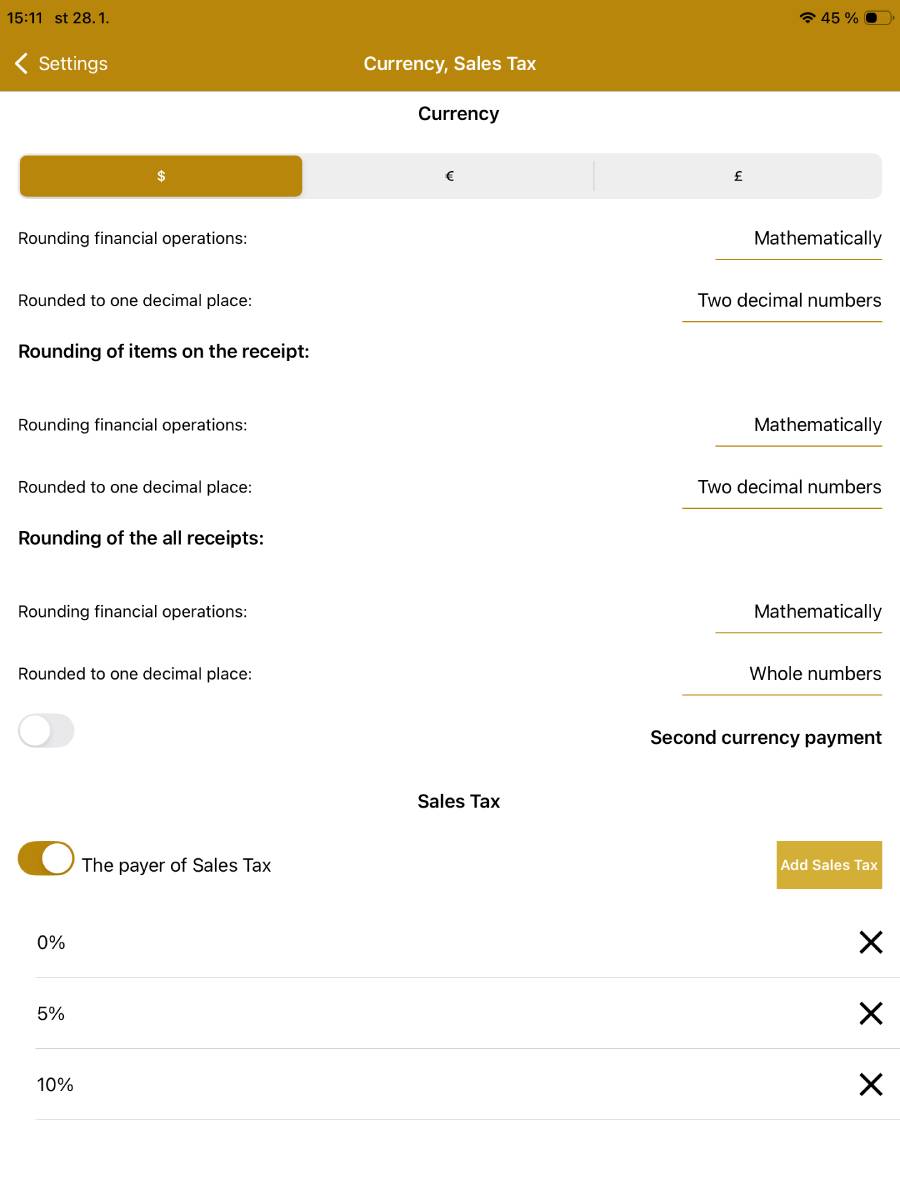
- Currency
- Set the application's primary currency.
- Choose from predefined currencies; USD is selected by default.
- Currency settings cannot be edited.
- Rounding financial operations
- Options: Mathematical (standard rounding), Always up, Always down.
- Rounded to one decimal place
- Options: Whole numbers, One decimal place, Two decimal places.
- Rounding of items on the receipt
- Rounding of financial operations
- Options: Mathematical (standard rounding), Always up, Always down.
- Decimal place rounding
- Options: Whole numbers, One decimal place, Two decimal places.
- Rounding of financial operations
- Rounding of the all receipts
- Rounding of financial operations
- Options: Mathematical (standard rounding), Always up, Always down.
- Decimal place rounding
- Options: Whole numbers, One decimal place, Two decimal places.
- Rounding of financial operations
- Sales tax
- Sales tax payer
- Toggle to activate the sales tax payer mode.
- Sales tax rates
- You can add a rate using the Add VAT button.
- Remove a rate using the X button.
- If sales tax rate is removed, all items that used that rate will automatically be set to 0 %.
- Sales tax payer
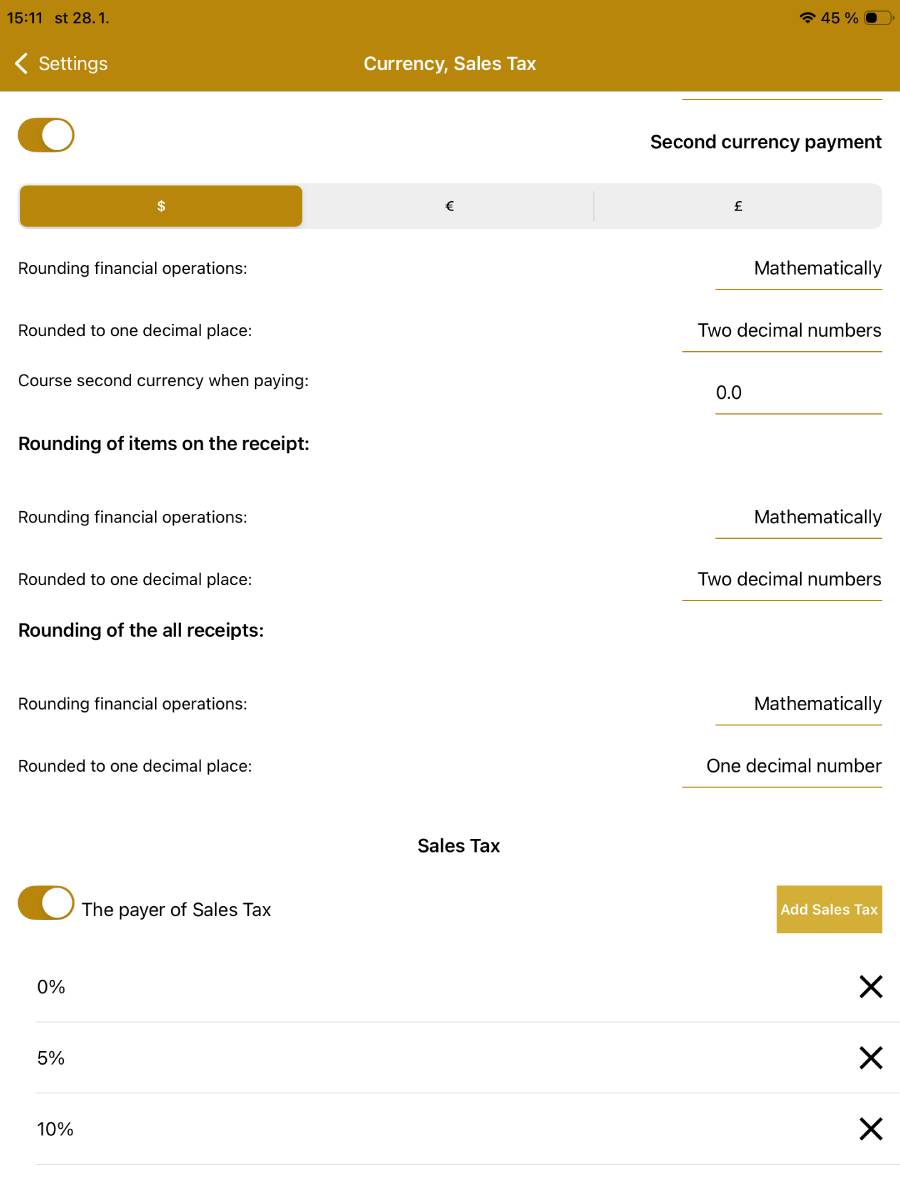
- Secondary currency payment
- Toggle to activate this feature.
- Set the secondary currency in which you can charge.
- The available settings are the same as for the primary currency.
- The symbol of the secondary currency appears in the dialog for closing the account.
3.2.11. Settings – Extensions, Purchases, Credits
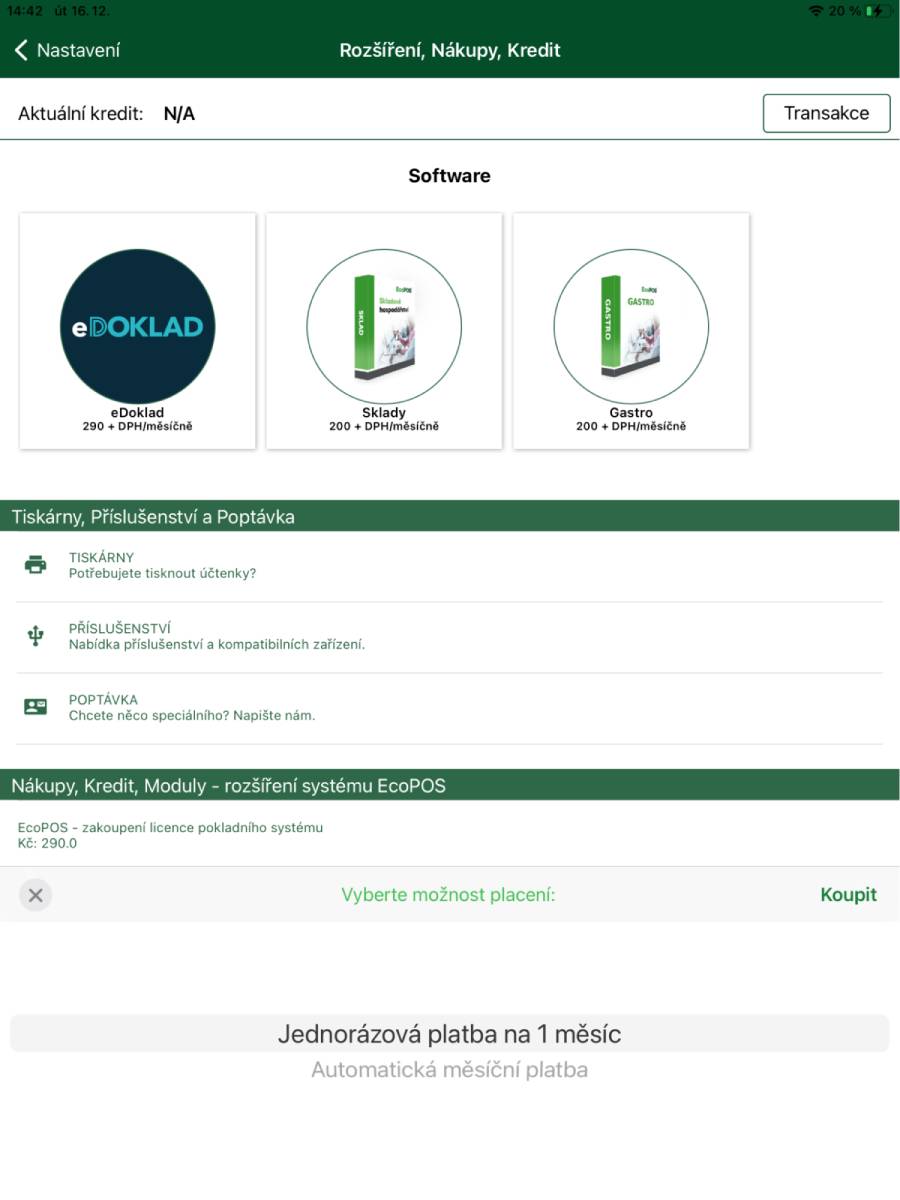
- Optional modules and credit top‑up
- In this part of the application you can purchase licence extensions for optional modules offered by the BitcoinPOS cash register system:
- Main licence extension
- Optional modules (Inventory, Payment terminal, eDoklad and others)
- Service actions
- Training
- Payment is made using a payment card and you can choose whether it will be a one‑off payment or an automatic recurring payment.
- The validity of the licence and modules is always 30 days from payment.
- Before the licence expires you will be notified by email of the option to extend it.
- In this part of the application you can purchase licence extensions for optional modules offered by the BitcoinPOS cash register system:
4. Statistics

- Print deposit/withdrawal on closure
- Switch to set printing of the deposit/withdrawal overview on the end‑of‑shift closure.
- Print record of sold items
- Switch to set printing of the overview of sold items.
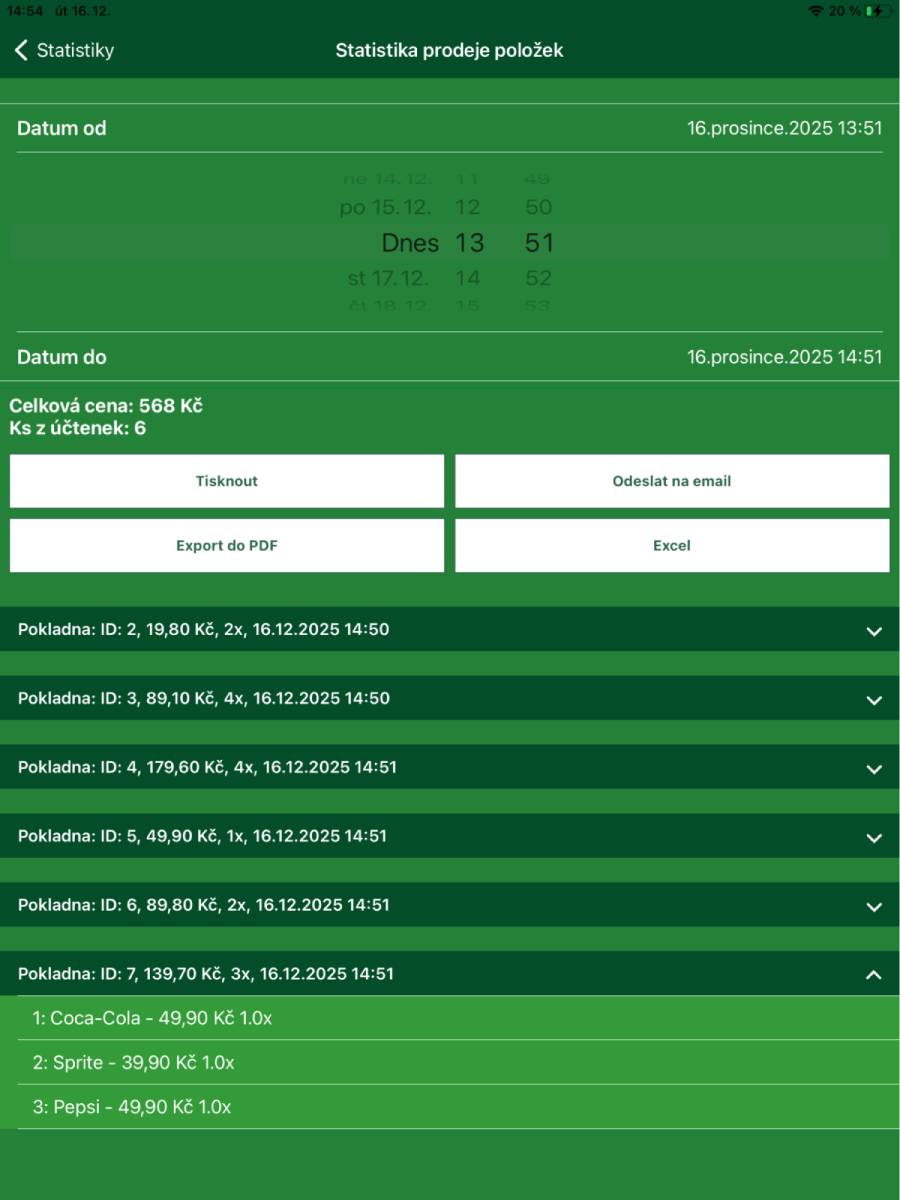
- Item sales statistics
- Date from
- Date and time from which the sales statistics are displayed.
- Date to
- Date and time until which the sales statistics are displayed.
- Total price
- Shows the total amount of sales and the number of issued receipts.
- Print
- Button to print the sales statistics.
- Send to email
- Button to send the sales statistics to an email.
- Export to PDF
- Exports the displayed data to a PDF file.
- Excel
- Exports the displayed data to Excel and sends it to the specified email.
- Date from
- Sales details
- For each closed account the following information is displayed:
- Total account amount.
- Number of items sold.
- Time of account closure.
- In the detail, the specific sold items, including price and quantity.
- For each closed account the following information is displayed:
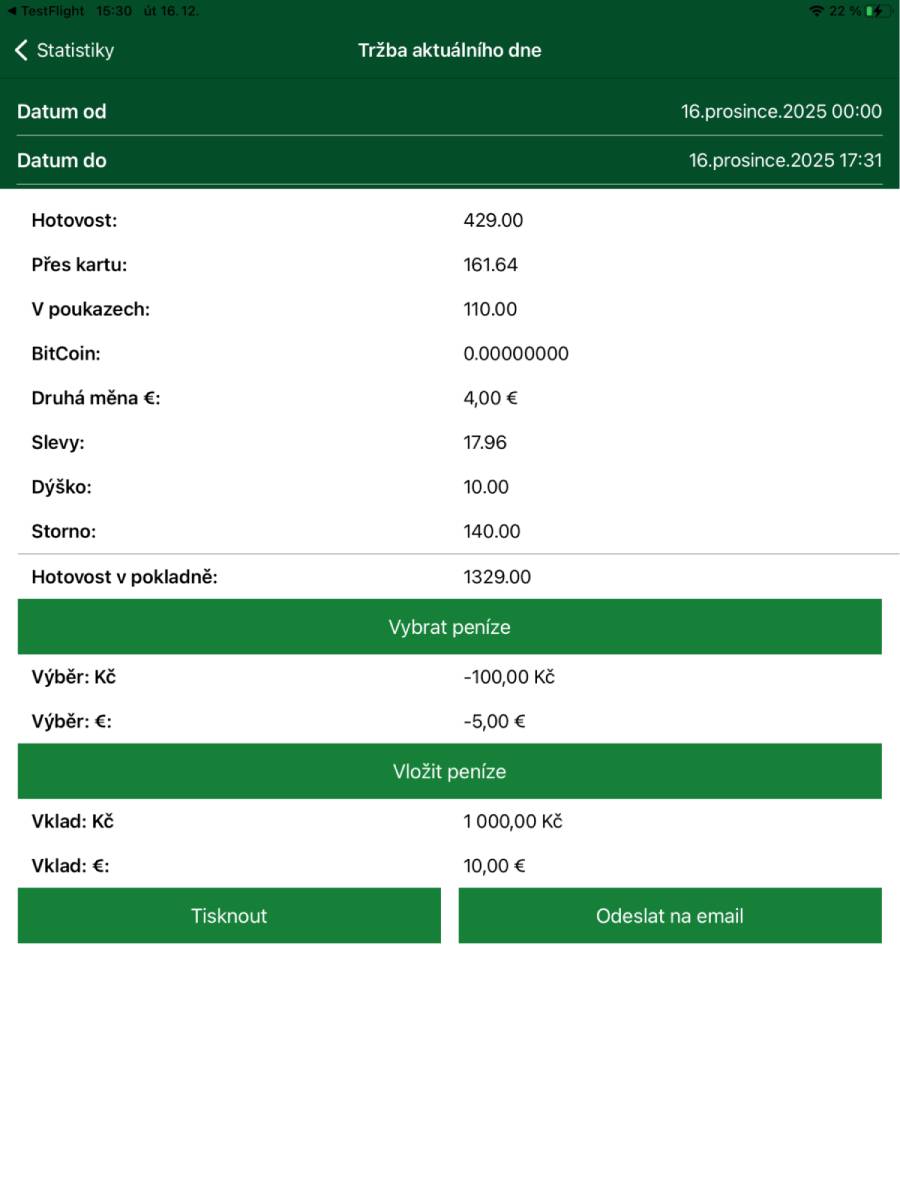
- Takings for the current day
- Date from
- Date and time from which the statistics are displayed.
- The current date and time 00:00 is set automatically.
- Date to
- Date and time until which the statistics are displayed.
- Statistics details
- Cash
- Sum for accounts paid in cash.
- By card
- Sum for accounts paid by card.
- In vouchers
- Sum for accounts paid with vouchers.
- Bitcoin
- Sum for accounts paid in Bitcoins.
- Second currency
- Sum for accounts paid in cash in the second currency.
- Discounts
- Sum of the discount granted for all accounts on which a discount was given.
- Tip
- Sum of tips entered during payment.
- Cancelled
- Sum of cancelled closed accounts.
- Cash in cash register
- Sum given by the sum of the lines Cash, Withdrawal CZK and Deposit CZK.
- Cash
- Date from
- Withdraw money
- Option to withdraw cash from the cash register in CZK and the second currency.
- Deposit money
- Option to deposit cash into the cash register in CZK and the second currency.
- Print
- Button to print the statistics according to the set filters.
- Send to email
- Button to send the statistics according to the set filters to an email.
5. Customers
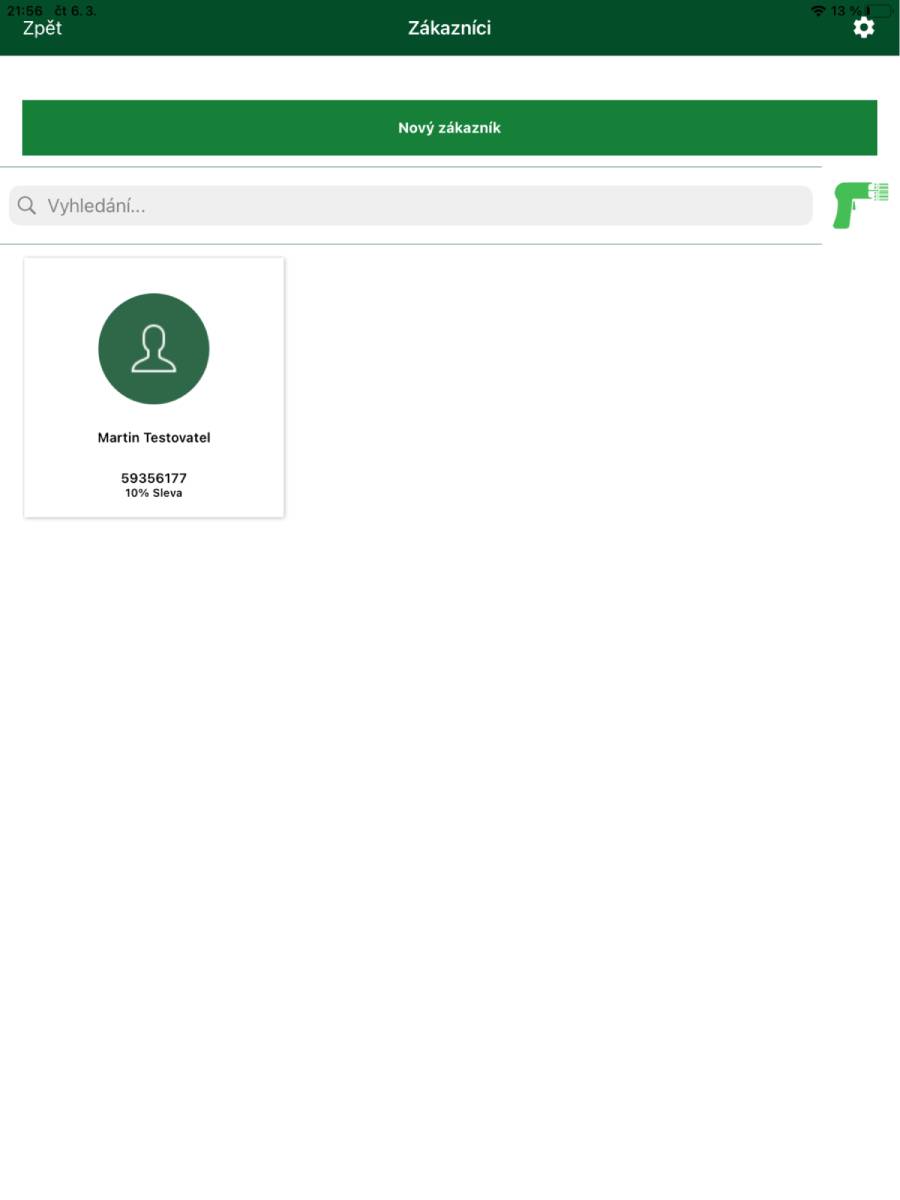
- Basic overview of registered customer accounts in the application.
- A new customer is created via the New customer button.
- To search in the customer list you can use the field with the option to manually enter text or use the button to scan the number/EAN of the customer card using the device's camera.
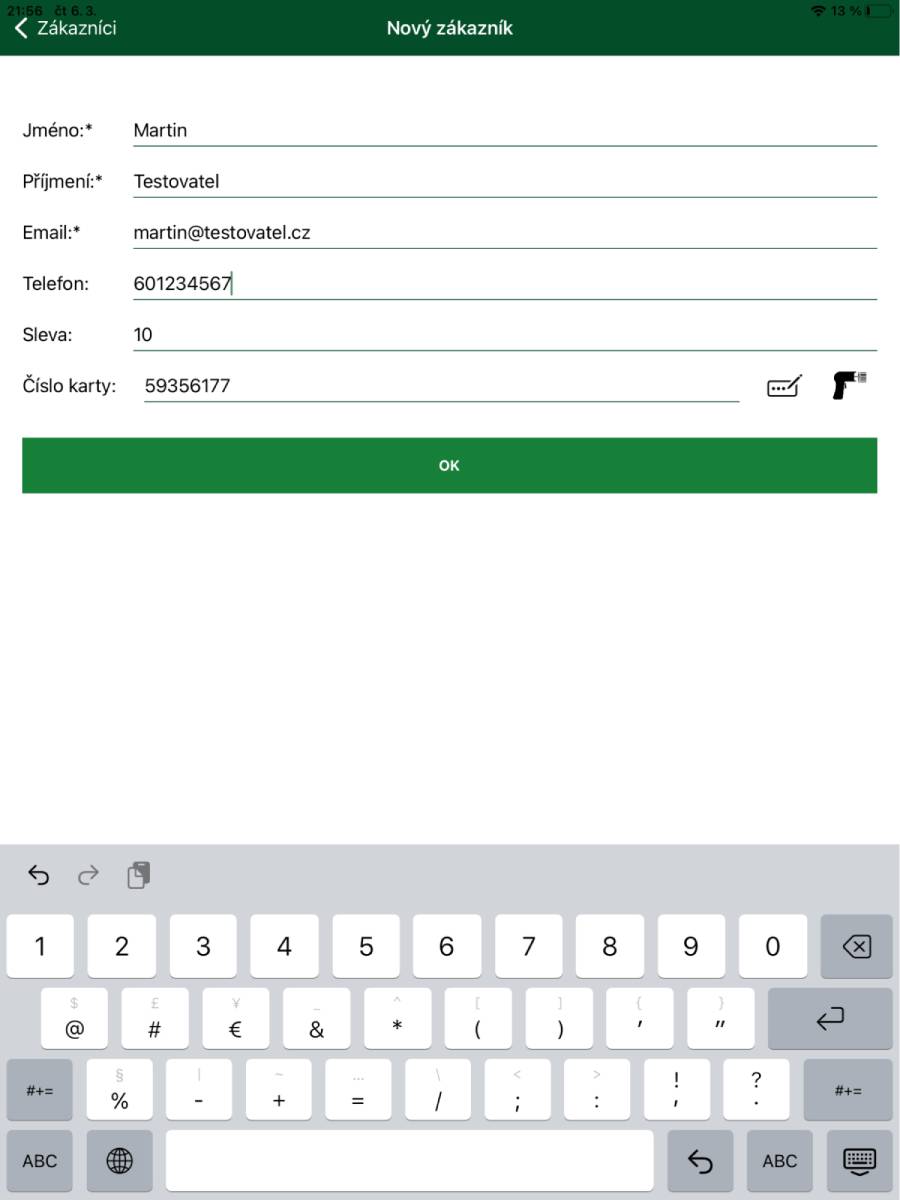
- Create new customer / Edit customer
- Fields required to be filled in are marked with an asterisk *.
- Discount
- Enter only a numerical value without the % sign.
- The card number can be entered:
- Manually by filling in the field.
- Using the number generator.
- By scanning the card's EAN code using the device's camera.
- Add button / OK (when editing)
- Used to save the changes made.
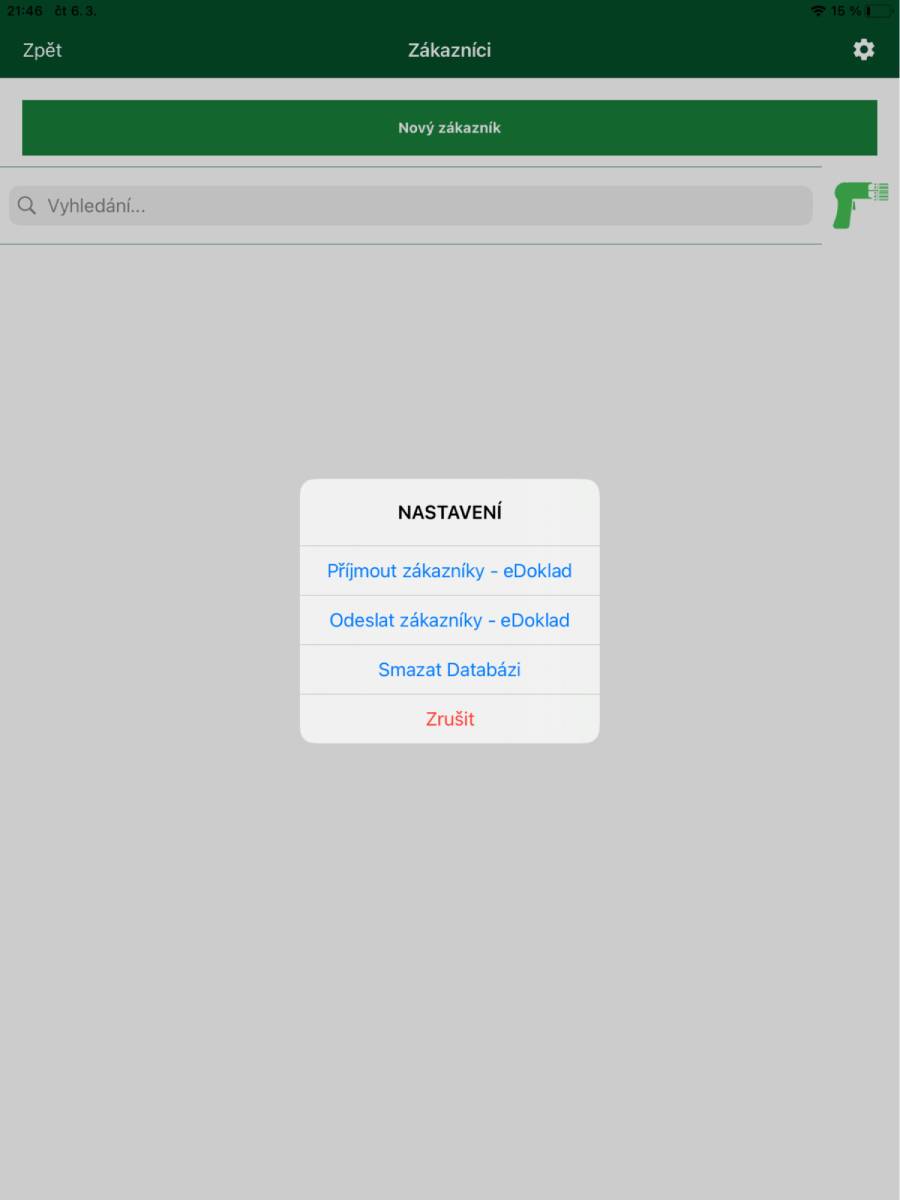
-
Gear button
- Use this button to open the menu for additional functions:
- Accept customers – eDoklad
- Imports all customers stored in eDoklad and updates the customer list in the application.
- Send customers – eDoklad
- Sends all customers stored in the application to eDoklad.
- Delete database
- Deletes the customer database in the application.
6. End shift

- Ends the shift and, according to the application settings, prints the shift closure on the printer or sends it to the configured email.
- After ending the shift, the login screen is displayed.
7. About the BitcoinPOS application
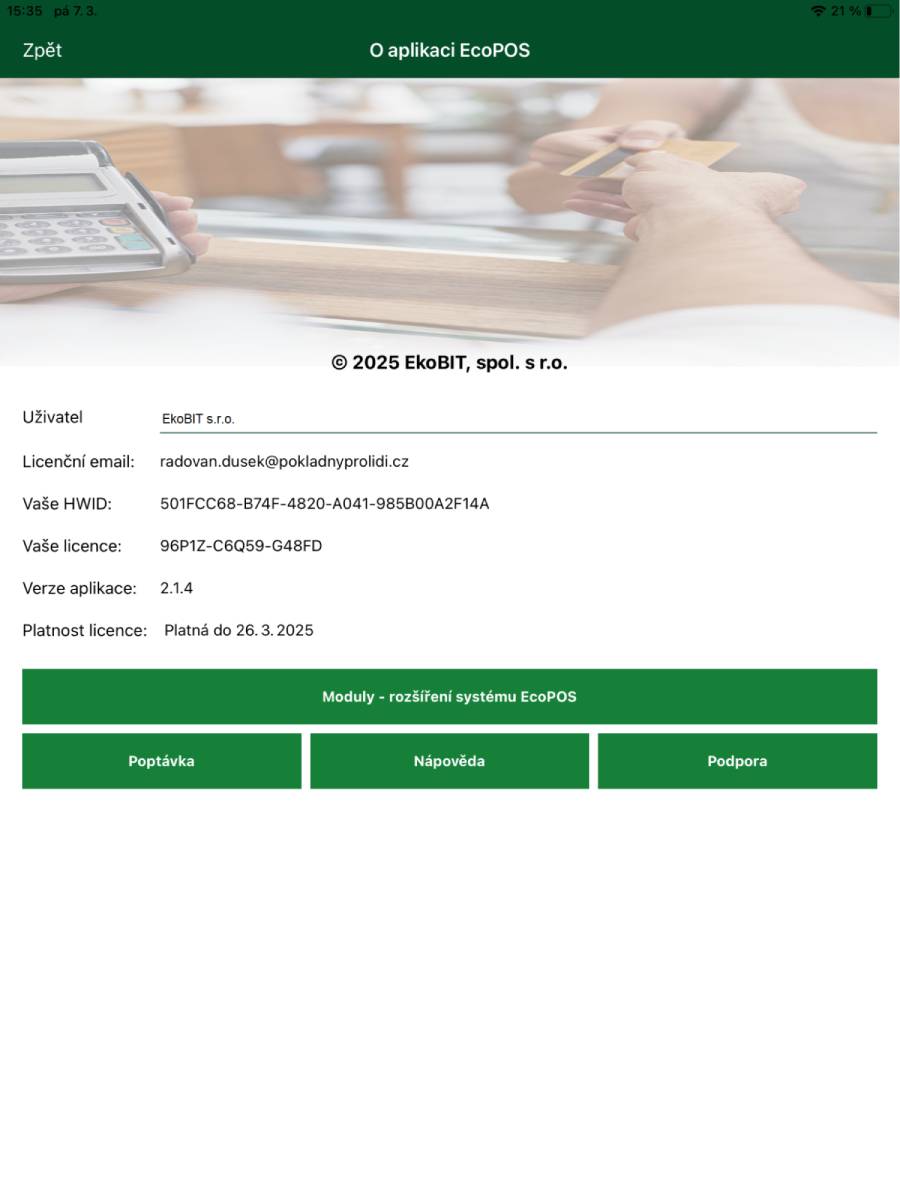
- Overview of your application
- License owner, license number, license validity and other data.

- Modules – BitcoinPOS system extensions
- Displays an overview of modules available for the application.
- A green icon means the module is active.
- A red icon means the module is inactive.
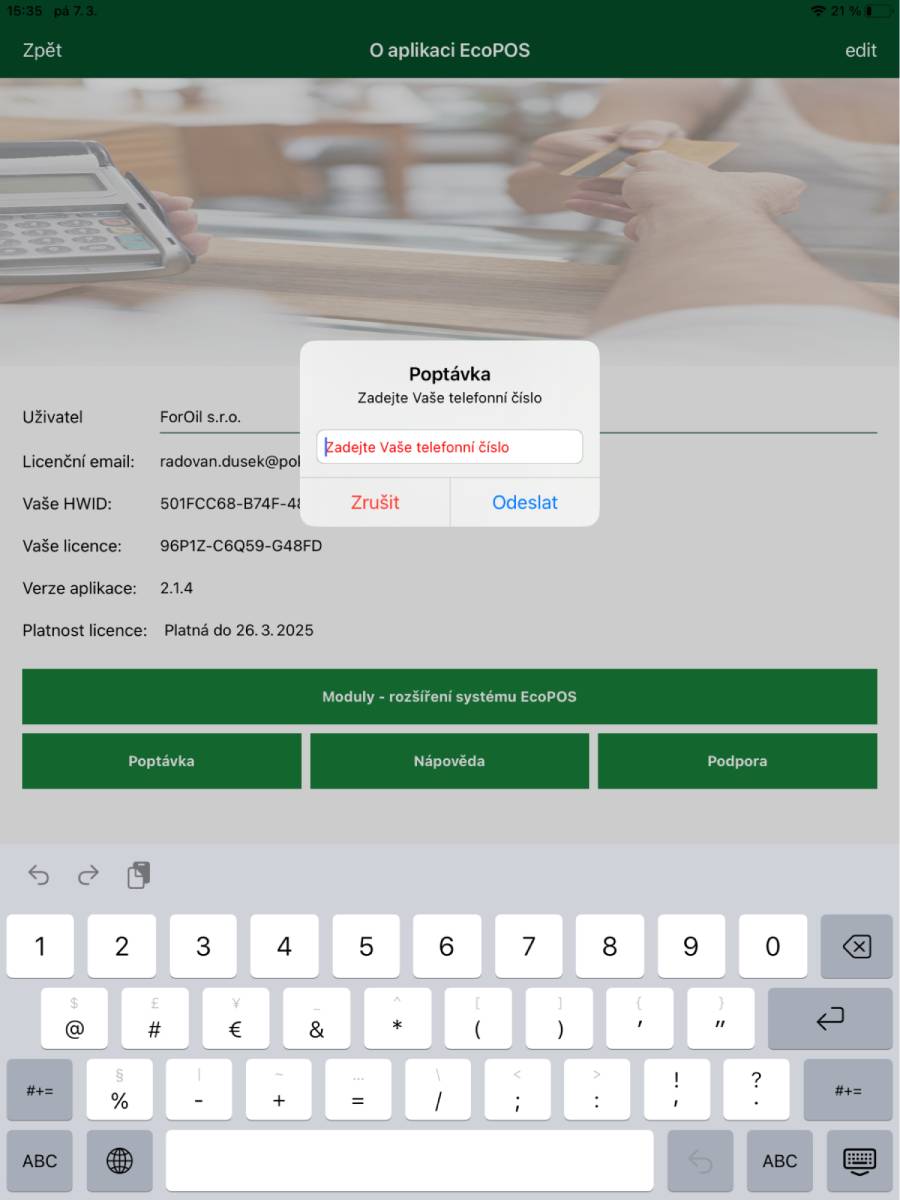
- Enquiry
- Dialog to enter a phone contact and send an enquiry to EkoBIT Ltd.
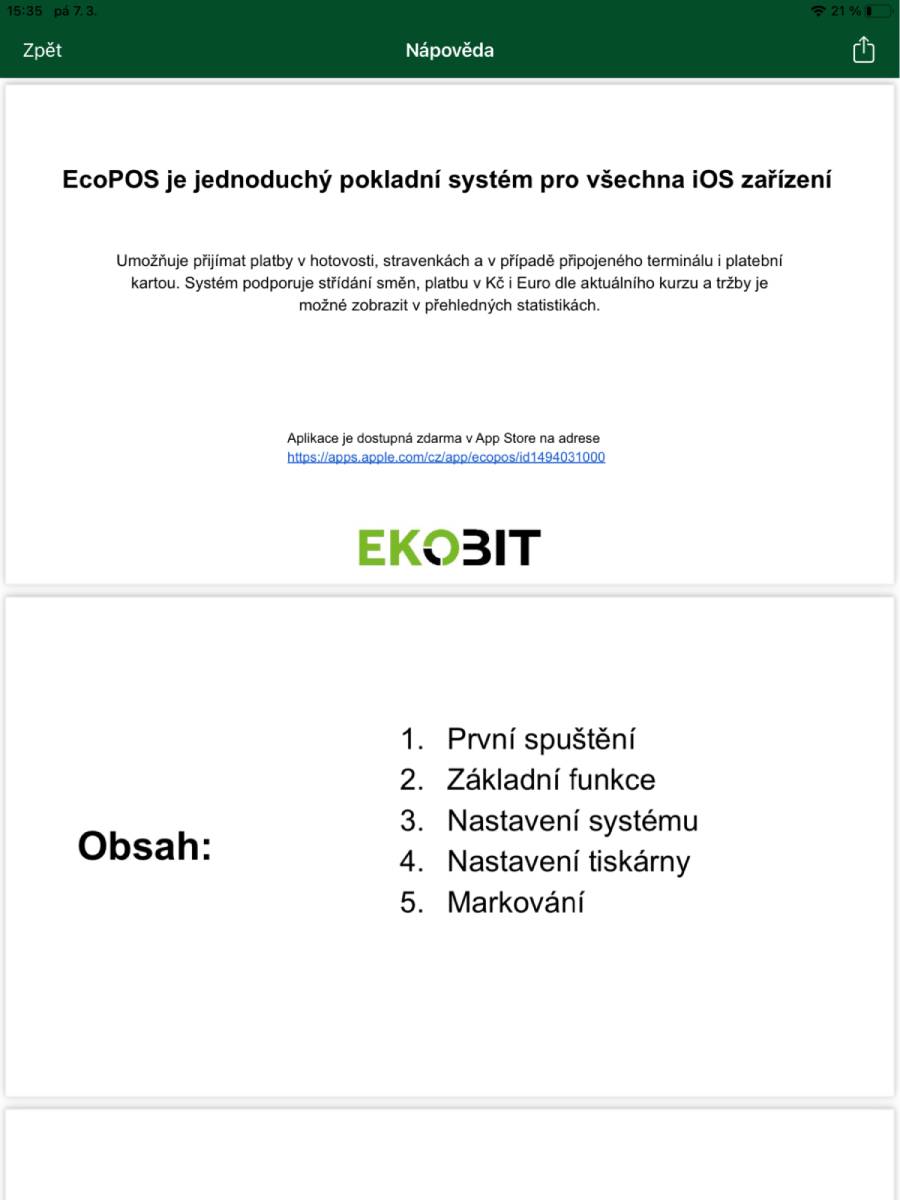
- Help
- Displays the help file for the application.
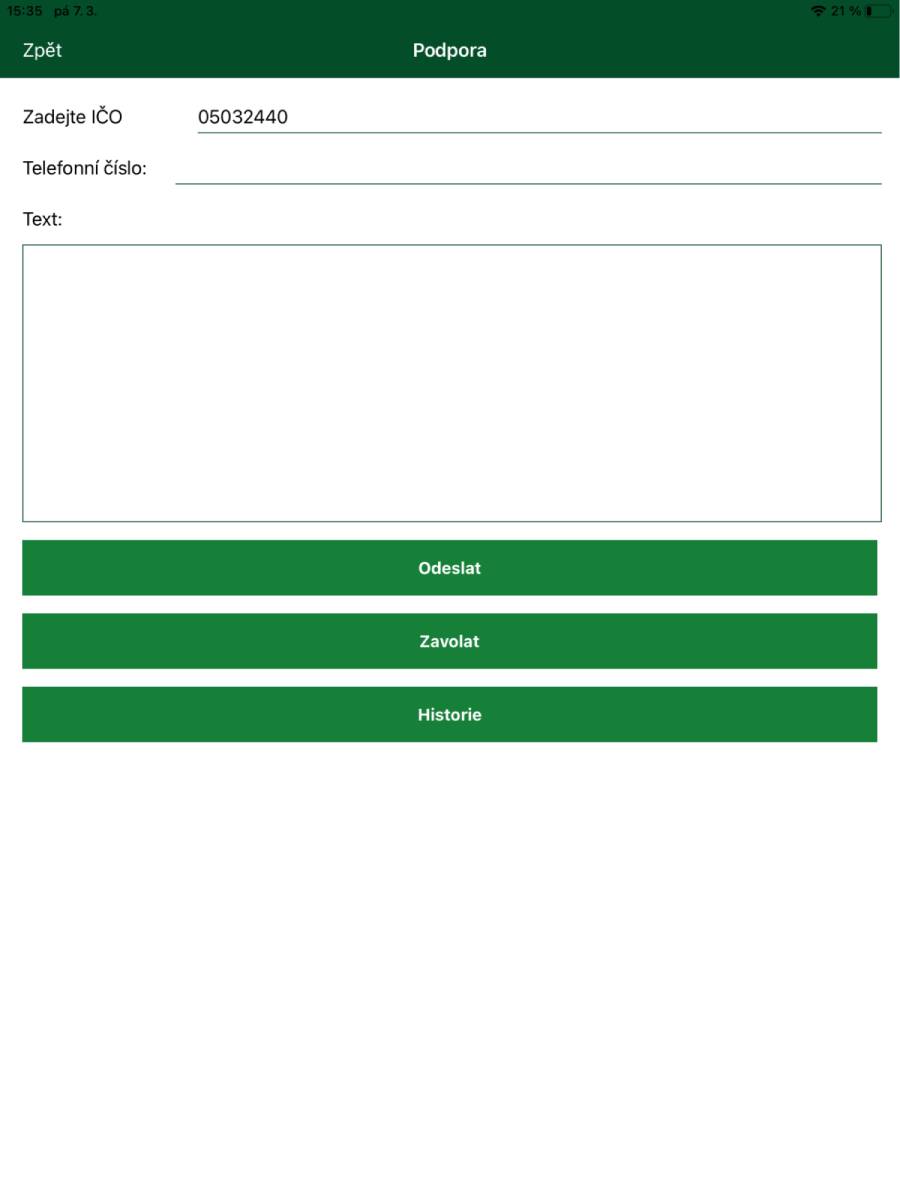
- Support
- Contact form for sending a request for application support.
8. Quit application

- Closes the application without ending the shift.
9. Universal cash register – Marking section
9.1. Marking using the calculator
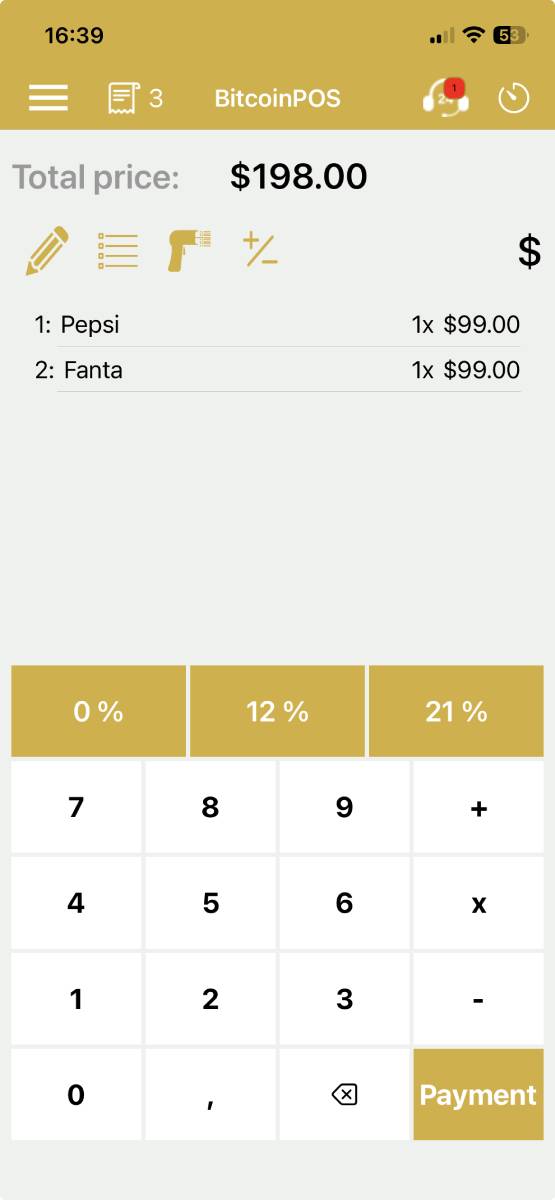
- Enter the amount manually using the numeric keypad and by selecting the VAT rate.
- The marked amounts can be seen above the numeric keypad.
- Total amount: The sum of the amounts from marked items.
- % – option to apply a discount.
-
 Allows you to preview the marked account; you can cancel an item or the entire account before payment.
-
 If you need to refund an amount or cancel, you can use this function. After clicking, you enter the amount and VAT and this amount will be recorded on the account with a minus sign.
-
 Enter a note for the amount. The note will be printed on the receipt.
-
 Switch between marking via numeric keypad or via items.
-
 Scan an item via EAN.
-
 You can mark an amount as a positive or negative number.
9.2. Payment screen

- Cancel: Button to cancel the current operation and return to the previous menu.
- Pay account: Button to confirm and perform payment.
- Print options
- Print: Prints the receipt.
- Email: Sends the receipt to the specified email.
- AirPrint: Prints the receipt via AirPrint.
- Amount to pay: Displays the total amount payable.
- Numeric keypad: Used to enter the amount the customer is paying.
- Payment options
- Vouchers: Payment via meal vouchers.
- Card: Payment by payment card.
- Cash: Payment in cash.
- Bitcoin: Payment with Bitcoin.
9.3. Marking using items

- Search: Search and filter items by the entered letters.
- Groups: Item groups; after selecting a group, the items assigned to that group are displayed.
- Price list items: Price list items for billing.
- Pay: Used to settle the account. When clicked, a window opens for further payment processing.
9.4. Editing marked items
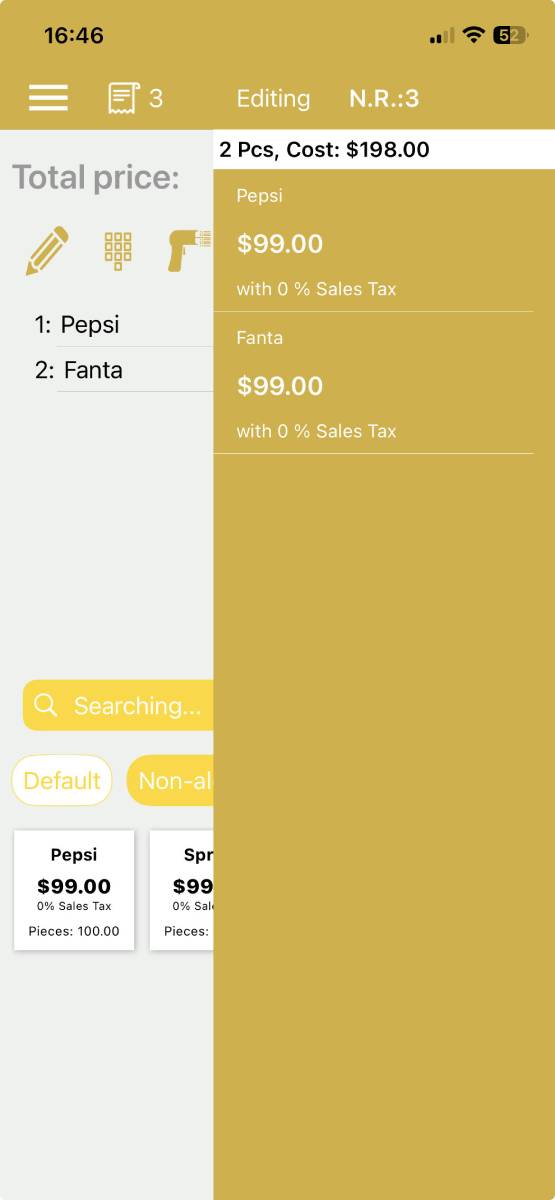
- By simply sliding the screen from the right side to the left, a table opens listing all items that have been charged.
- By clicking on the selected item you can apply a discount, remove a quantity or delete the item completely.
9.5.1. Gastro mode
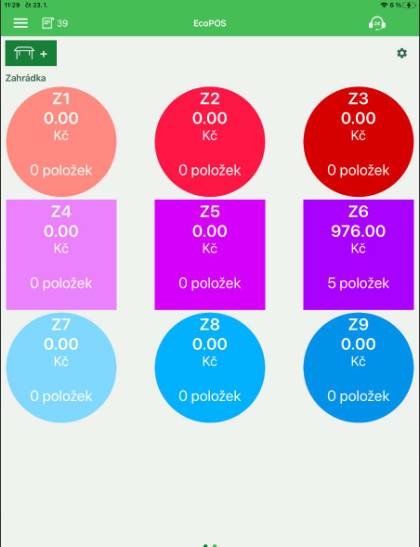
- Operation in Gastro mode is very simple. Work when marking orders is clearly done using a table map, where you can see which table has an open account and whether the table is occupied (there is something marked on it).
-
 Use this function to create new tables. You can add the table name and number for better orientation and also select its shape.
- Under the function you will find the name of the section (room) where the tables are located – it may be, for example, the restaurant section, garden or lounge. You set up sections using the gear button in the upper left corner.
9.5.2. Working with a table (account)
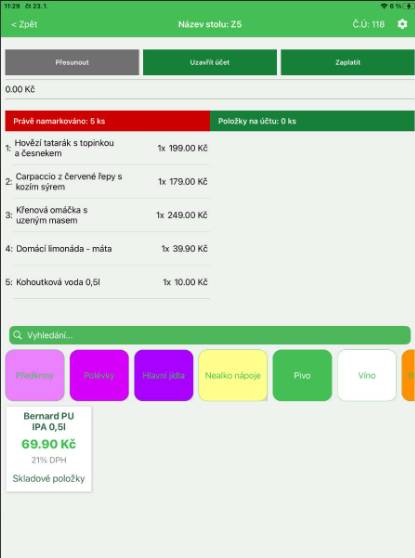
After selecting a table, an editing window opens where you can mark new items, edit existing ones and also pay the bill.
- Move: Use this function to transfer marked items to another table, for example if the customer moves to another table.
- Close: Used to close the order; the cash register returns to the table layout (enterprise map) window for further billing.
- Pay: Used to pay the account. When clicked, a window opens for further payment processing (described in step 10.2).
- Currently marked: Items that are currently being marked to the table and the order has not yet been closed via the Close account function.
- Items on the account: Here you see the items already marked and ordered.
At the bottom we see the price list groups and items for marking orders according to the guest's wishes. Use the Search function to find items faster.
9.5.3. Section and table settings
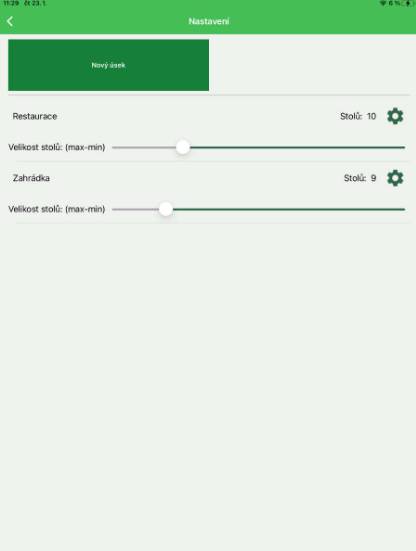
- Here you can create new sections for the cash register, e.g., Garden, Lounge etc.
- For each section we set the size and number of tables that will be displayed in the enterprise map.